Well hello there!
Nope, we didn’t sell the house and move, but it has been OVER a YEAR since our last blog post. Not too sure how that happened… time flies when you’re having fun! RIGHT? Needless to say, we’ve been busy.
I don’t know about all our fellow renovators out there, but rather than starting one project and seeing it through to completion, our method is to start 10+ and have them go on infinitely!
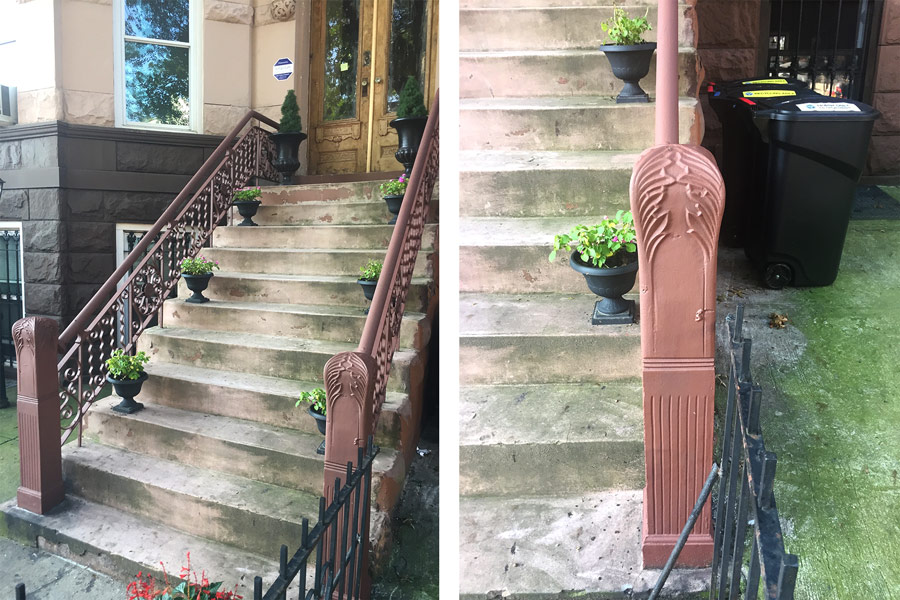
Our front door and stoop were two of those projects. We’d been talking about restoring both since day one, but all our inside projects always took priority. This makes sense, as we live inside and not on the stoop — but, walking up to the house everyday was painful. So much potential curb appeal if we could just get a chance to start!
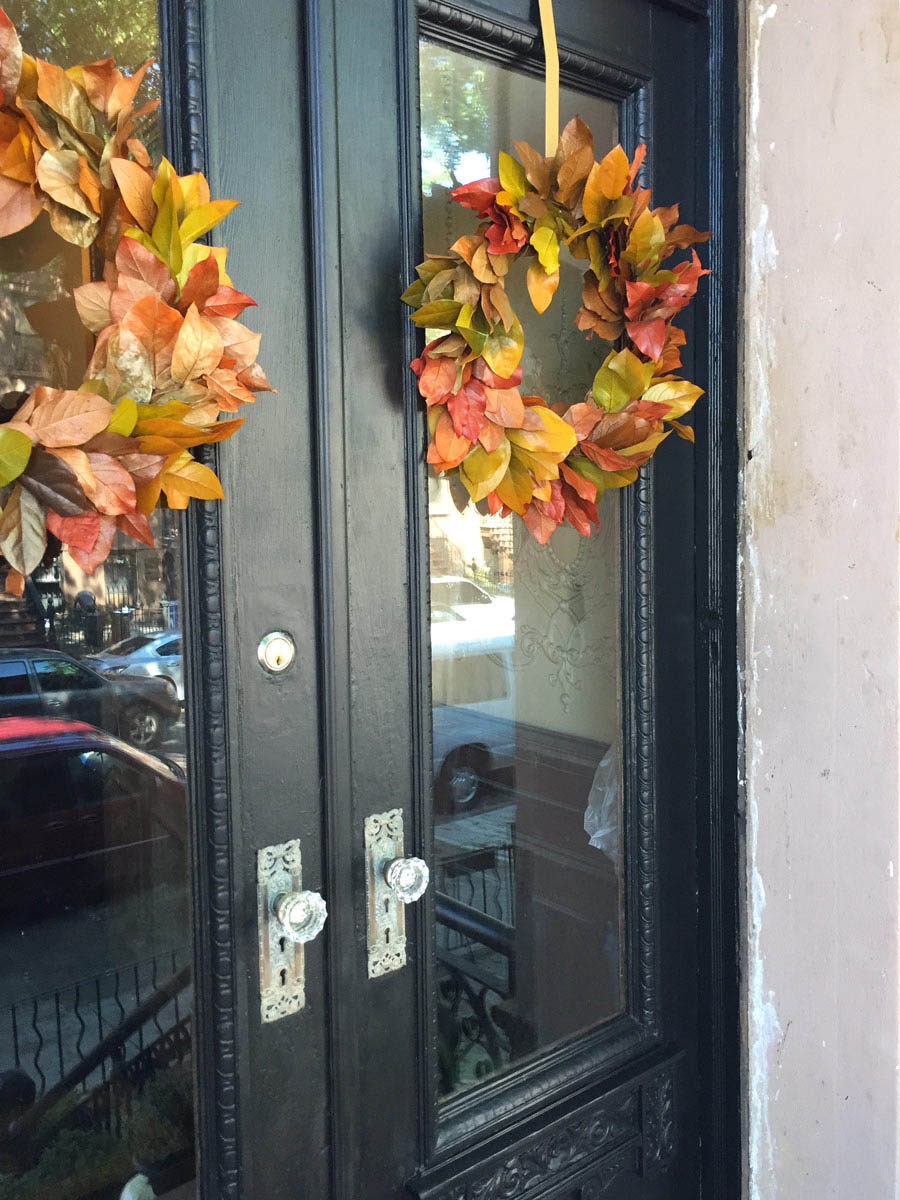
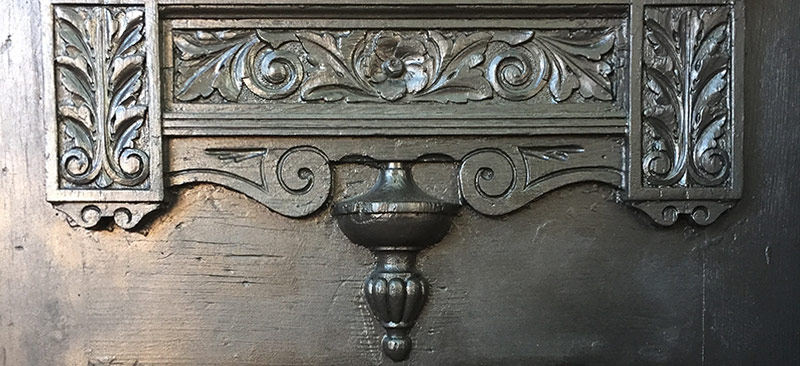
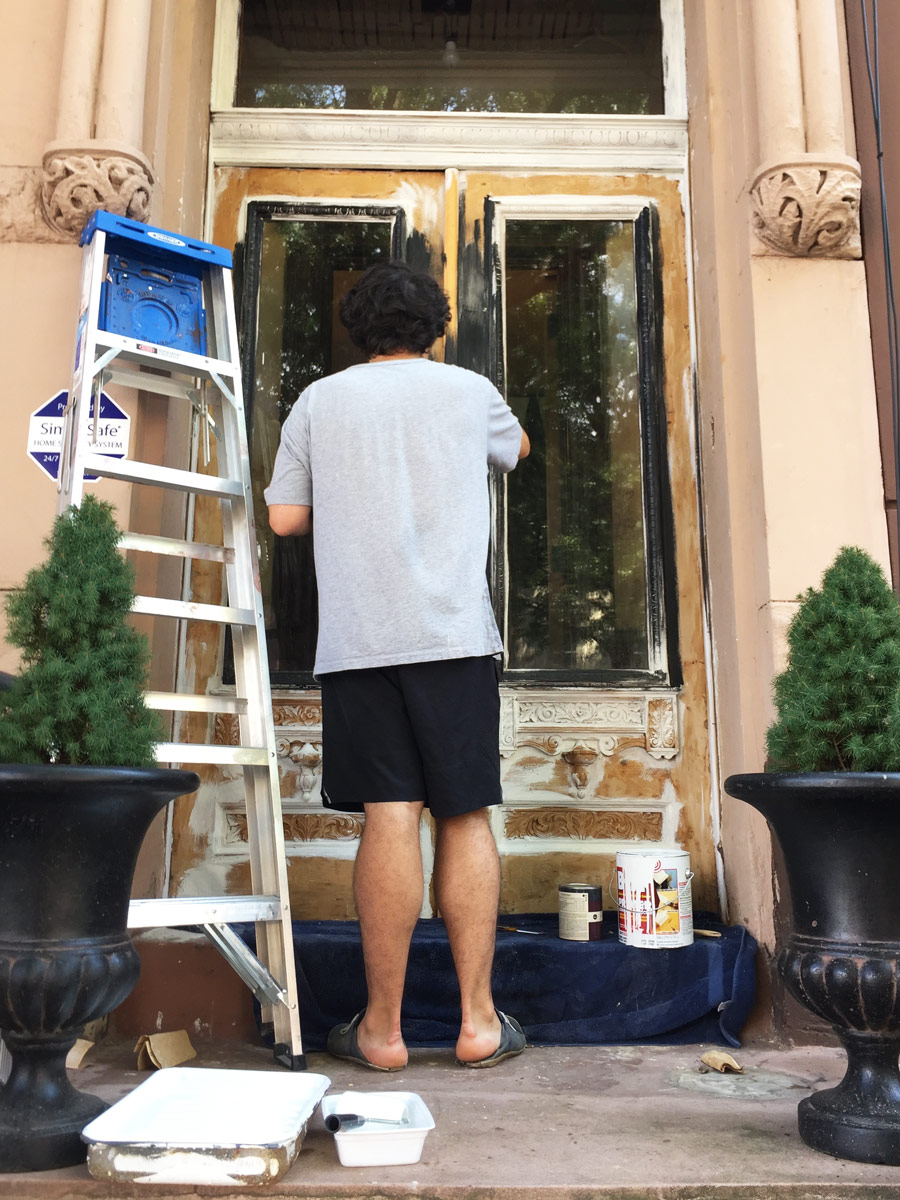
Sometime in the early spring of 2017, we finally did. First up was the doors. As with most surfaces in the house, they looked like they’d been painted at least 10 times, with the latest coat being a gross brown gel-stain. All the carved details were bloated and unfocused — even the door hardware had been painted over (why people… WHY?!).
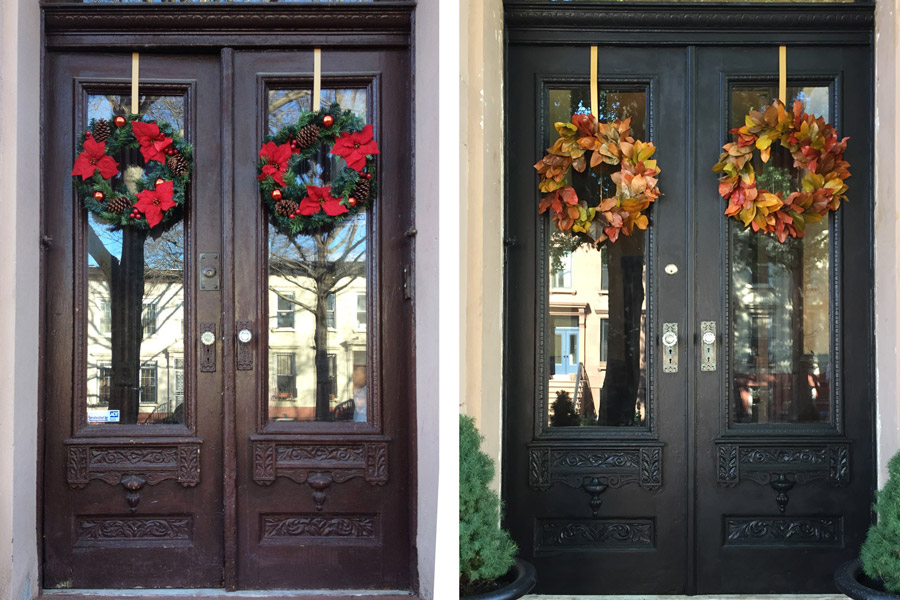
Before we dive into the process, here’s a side-by-side of the before and after. Old doors on the left, new doors on the right!
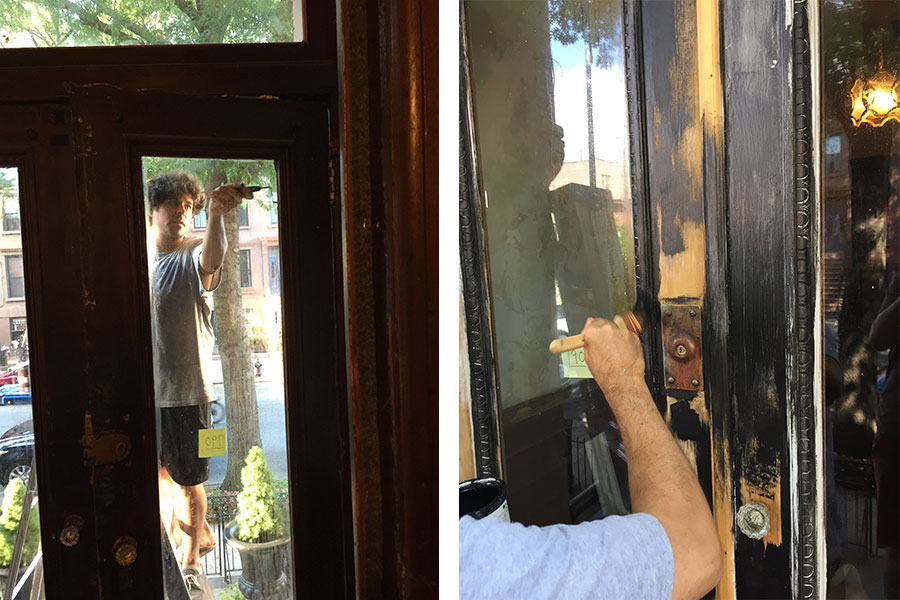
Stripping was the first step, of which we applied several methods over the next year. Heat stripping, chemical strippers, Peel-Away and good ol’ sanding were all employed in getting these doors back to the bare wood. Or, almost-bare-wood.
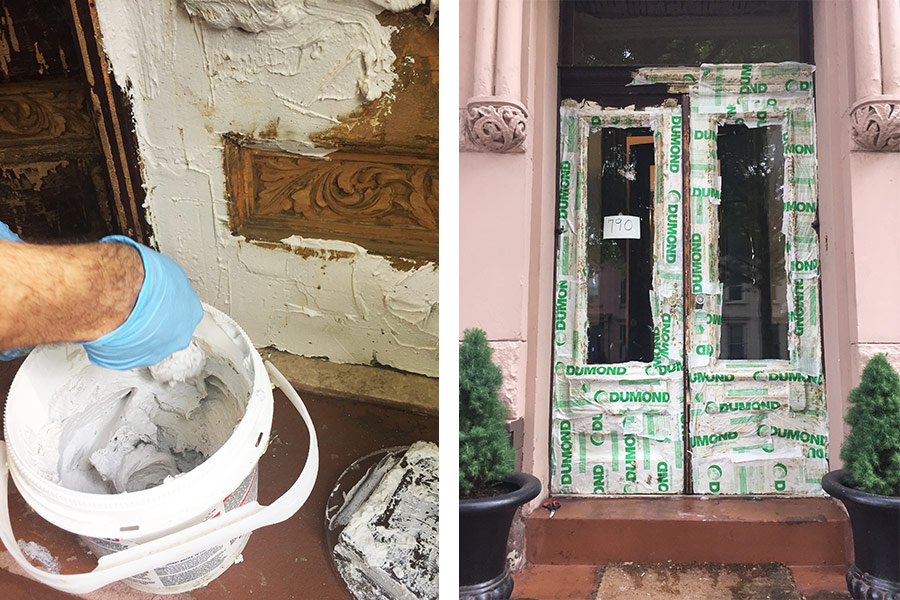
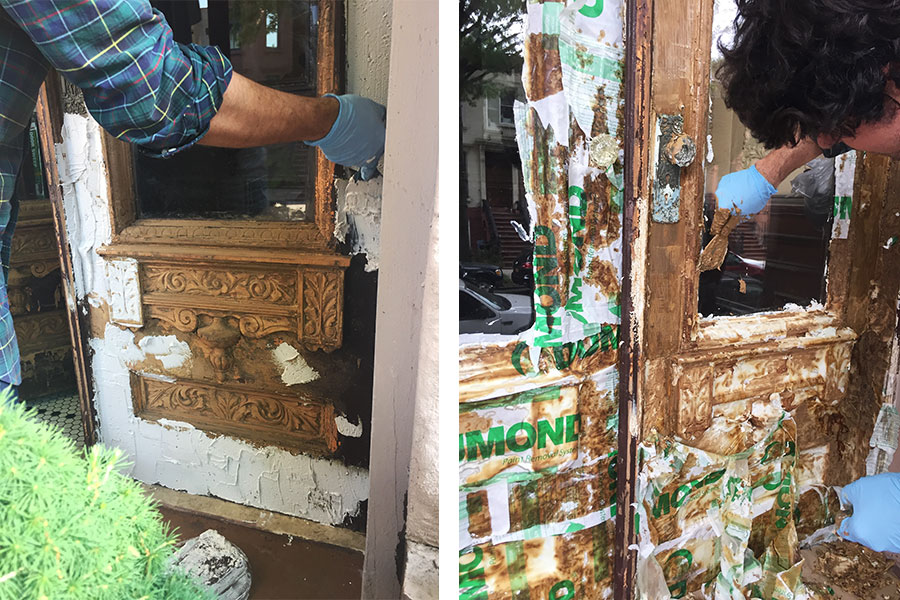
When we started, we weren’t sure whether we’d want to stain the doors (as they were originally), or paint them. Ultimately, the decision would be made for us as we got down to the actual wood. With 120 years of entering, exiting and exposure to the elements, they had taken quite a beating. Stripping revealed parts of the wood that had been patched with fillers, as well as other dings and imperfections that had been covered by the many layers of paint.
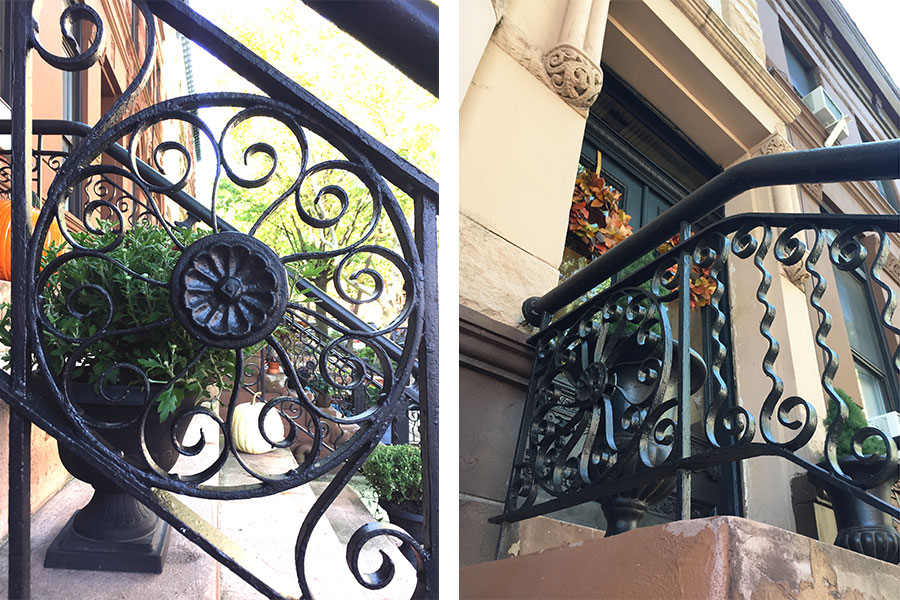
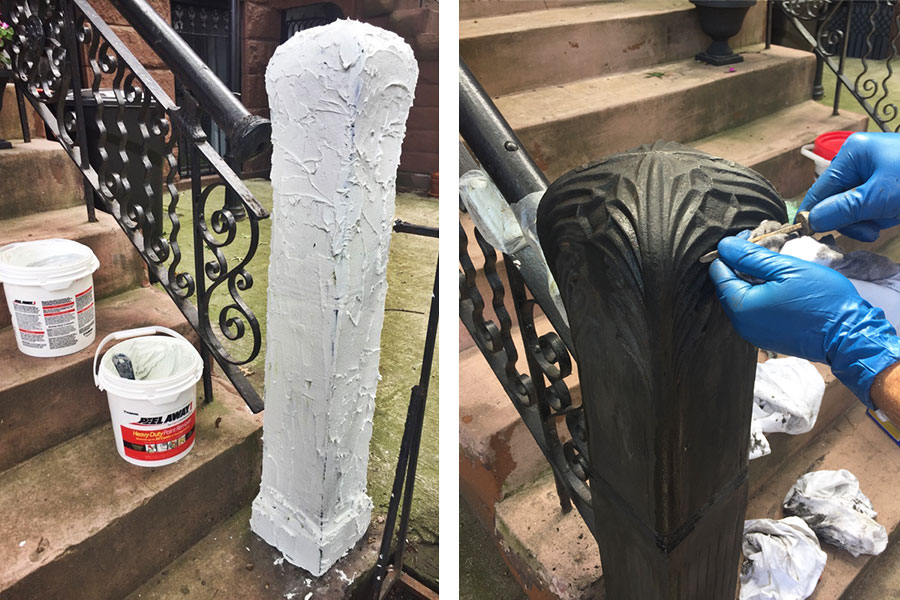
Happening along with the doors was the railing restoration. Overall, ours were pretty intact as compared to our neighbors’. There were a few spots that had rusted through but no missing pieces. However, as with the doors, layers of paint and corrosion had muted the beauty underneath.
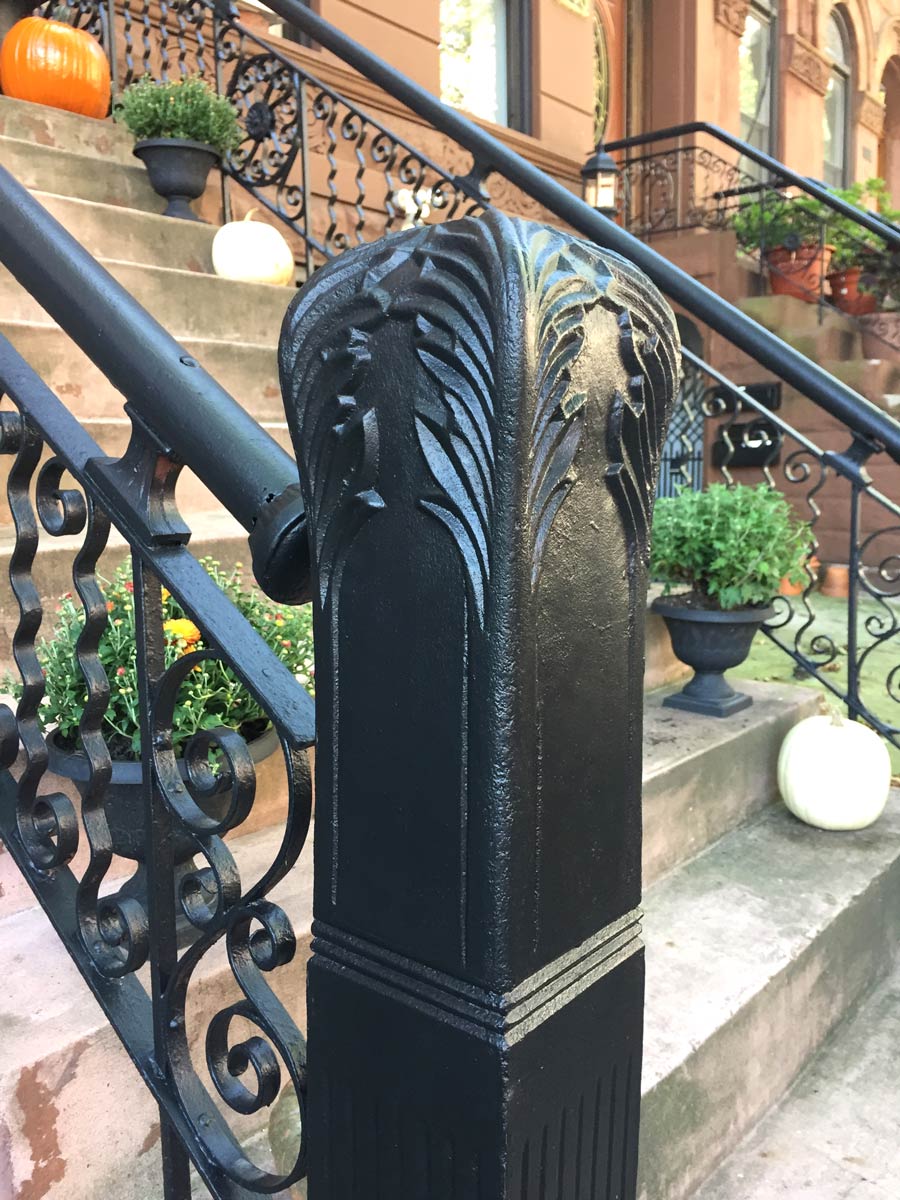
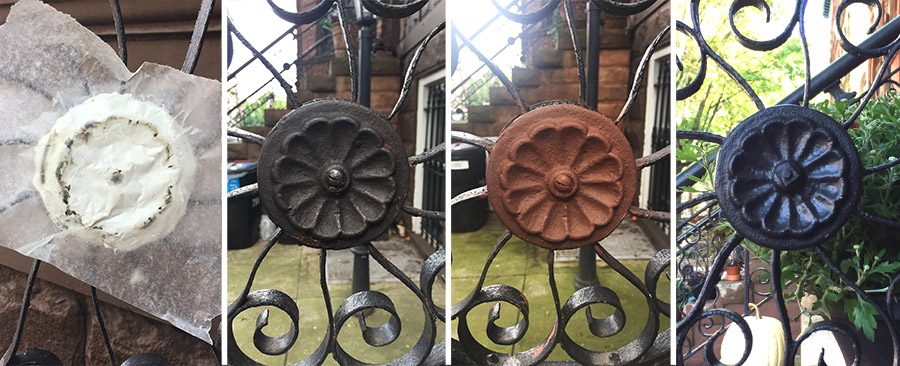
We decided to try Peel-Away on the two newel posts and it worked brilliantly! About two applications, plus a lot of scrubbing with wire brushes got us down to the bare metal. For the rest, we applied Peel-Away to any ornamentation and scrubbed all the railings of any flaking paint and rust.
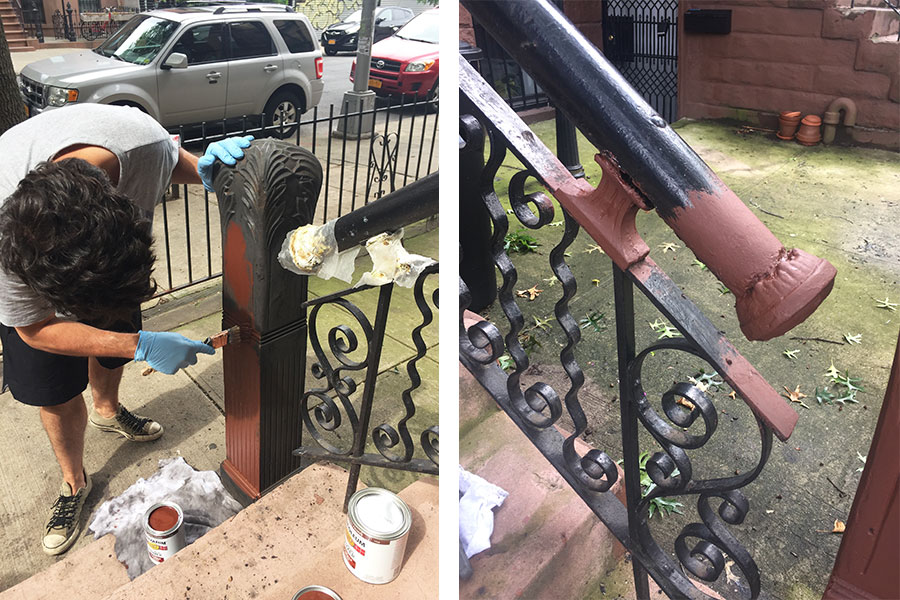
 Once clean, we immediately wiped everything down with mineral spirits and applied a coat of Rust-Oleum metal primer. Being bare iron, the raw metal was practically rusting before our eyes, so it was critical to get the primer coat on ASAP.
With the ironwork and doors nearing the end of their stripping process, we were faced with the biggest decision of all — color.
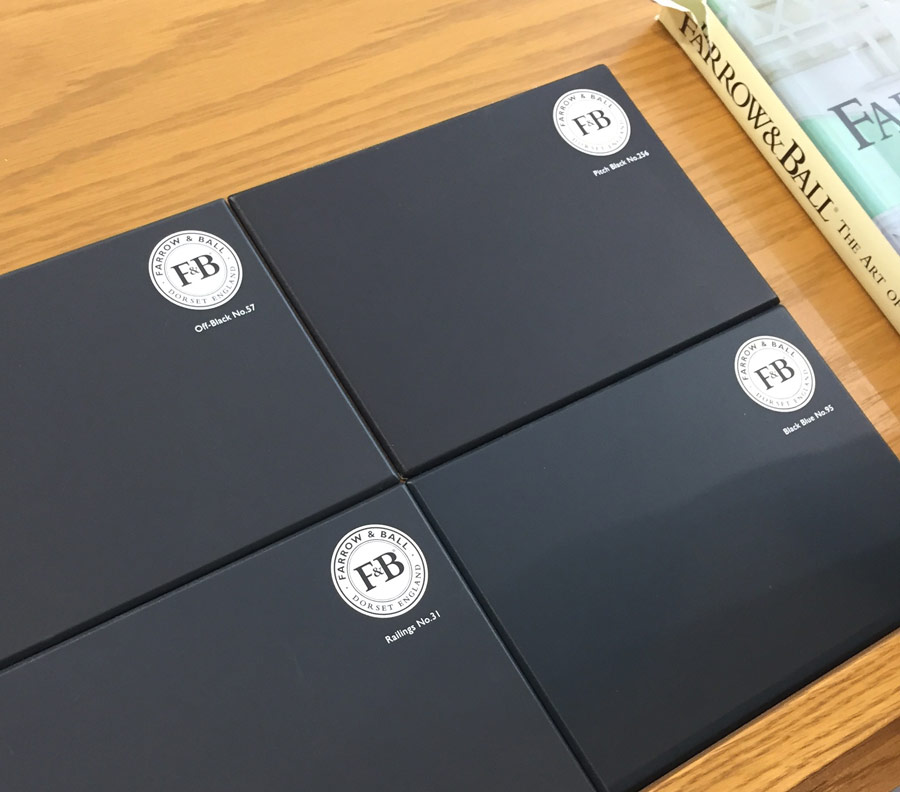
Initially, we felt the need to use oil paint since we were dealing with metal that would be outdoors. But oil paints basically just came in black and white. We definitely wanted black, but preferably something with a bit more personality.
After asking around, we ended up at Farrow & Ball. While water base, their paints are of such high quality that they hold up to the elements (or so the salesman told us). Their color offerings were on-point though, and we ended up going with “Pitch Black” in eggshell for both the door and the railings. While definitely black, the color has a slight trace of slate blue when the light hits it just right. It’s pretty — lots of richness and depth with character. Just like us. (lol)
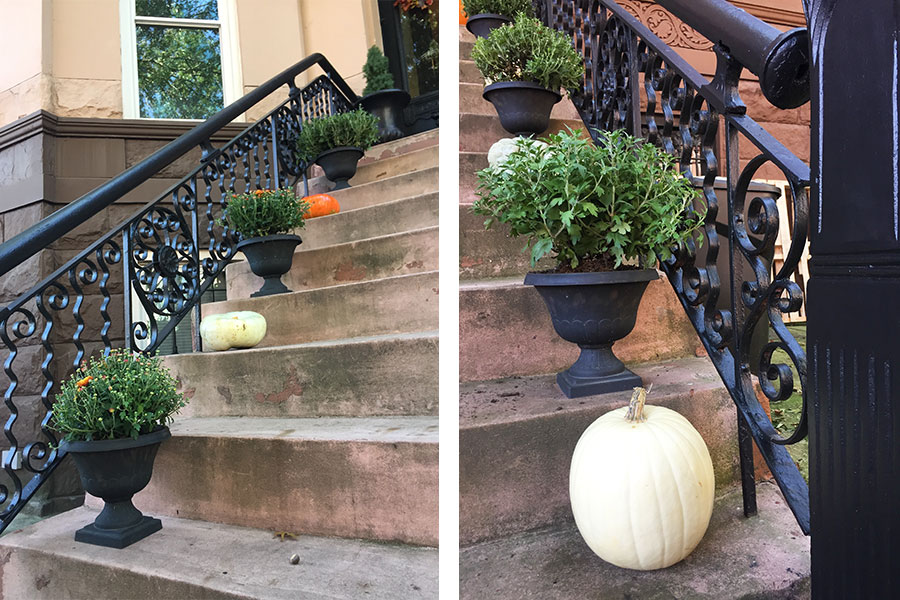
Buckets in hand, we proceeded to paint the railings over several weekends. It probably doesn’t look like much, but there’s enough surface area on all those spindle ribbons to go to Jersey and back at least twice.
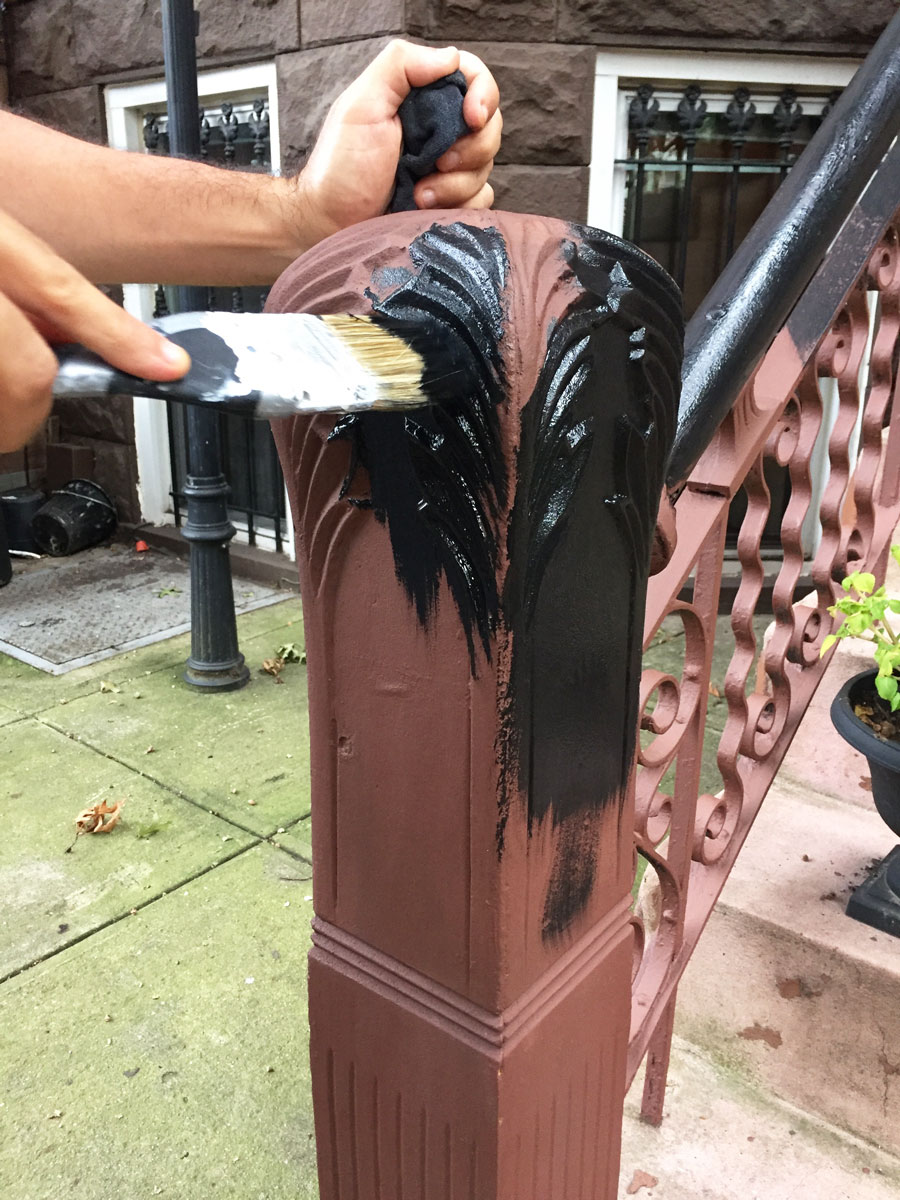
 Next up were the doors. James (bless his heart) literally poured his heart into these doors. While the railings were a joint-venture, the doors were all him. Over another few weekends, he applied 2-3 coats while continuing to patch, repair and prime as needed.
Then finally, one day, just like that, they were finished.
There’s still more to do of course — we want to replace the glass (as it’s been scratched in places). And a much bigger job — eventually re-surface the brownstone on the stoop and entry. And paint the house… and the front fence… and replace the windows… and paint the cornice…
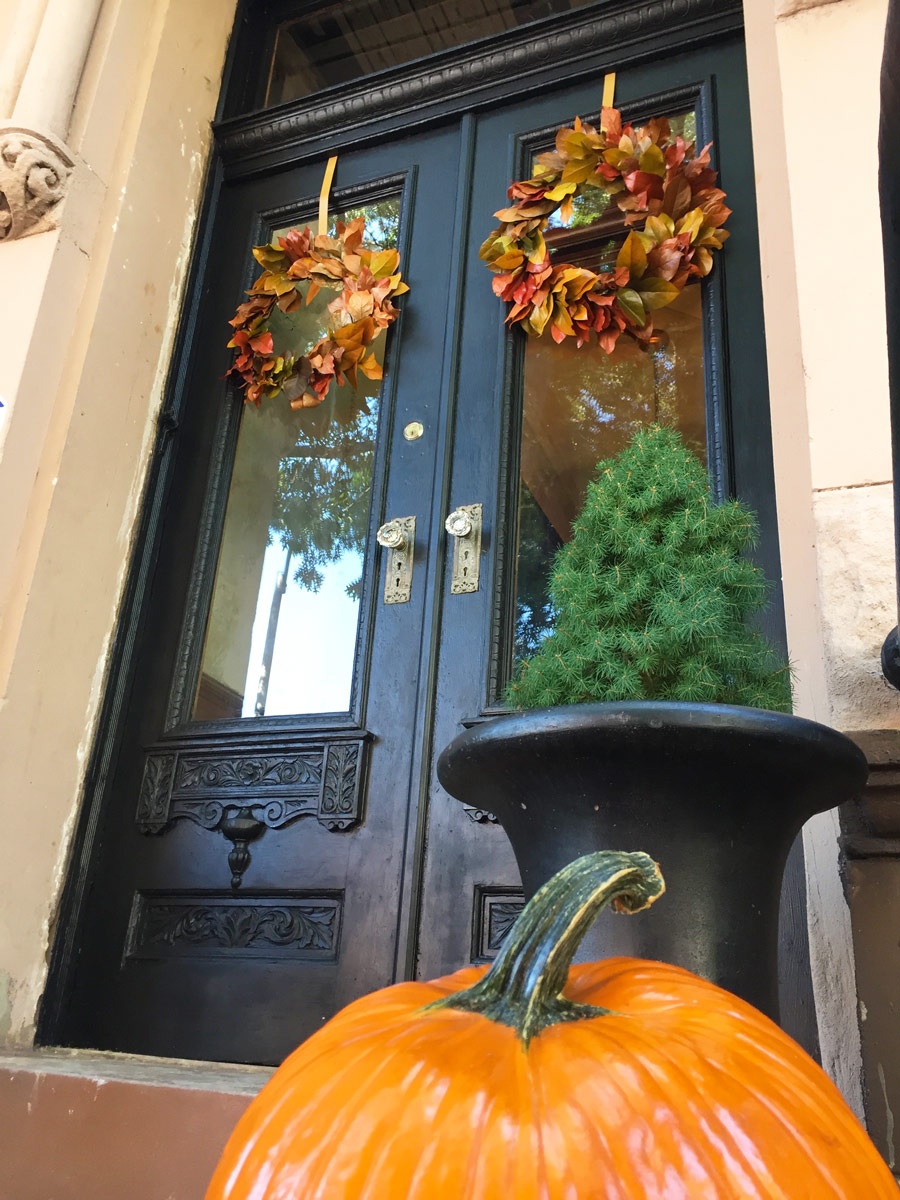
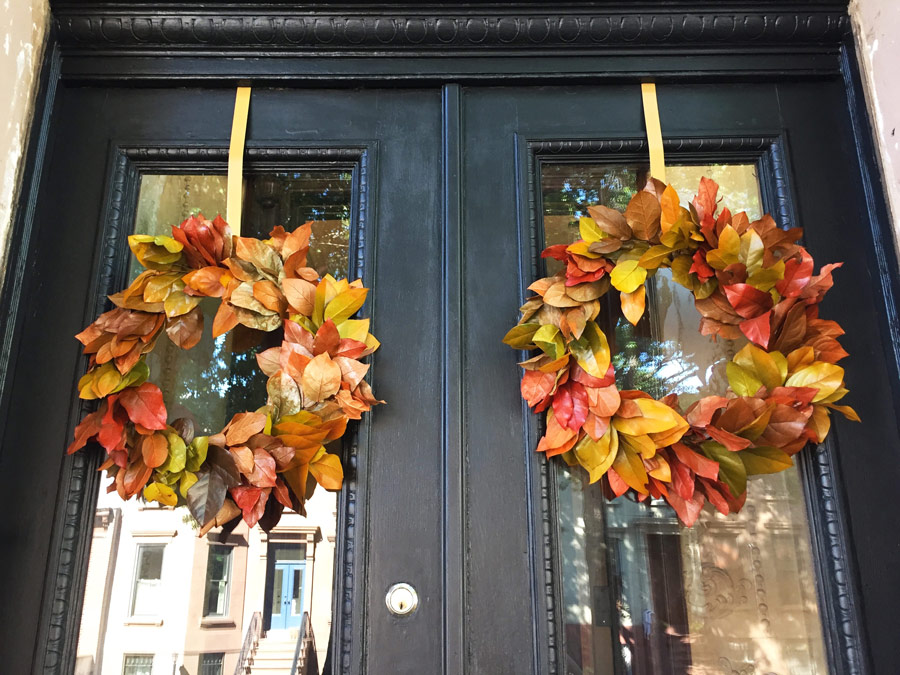
But for now our brownstone stands just a bit taller, making a big leap forward from stale to stately. And just in time for Fall / Halloween decor! (see below)