Nowadays, many brownstones are divided up into multiple households, but when they were first built, most were single family homes. Because of this, they generally had just one kitchen which was usually on the garden level.
This was the case for us, as we had only one functioning kitchen on our garden level when we bought the house. We renovated that kitchen, but it became part of the garden level apartment. Our plan was to live on the parlor level and third floor of the house, which meant we had to create a kitchen where there wasn’t one before.
Planning
As it was, the parlor floor was basically one giant room that ran from the front of the house to the back. Originally, this would have been the front and rear parlors, with a pass-thru room in-between. Considering our living situation, it made sense for the kitchen to go on the parlor level, since that’s where the living and dining room would be. Going back to our trusty floor plan, let’s take a look at the before and after:

As you’ll see, the previous owner had been using the back parlor as a living room, and the middle room as a bedroom. Our plan was to make his living room our kitchen, and his bedroom a dining room. Plus, it made sense for the kitchen to go in the back as the utilities (gas and water) could be simply extended from the tenant kitchen that was on the floor below.
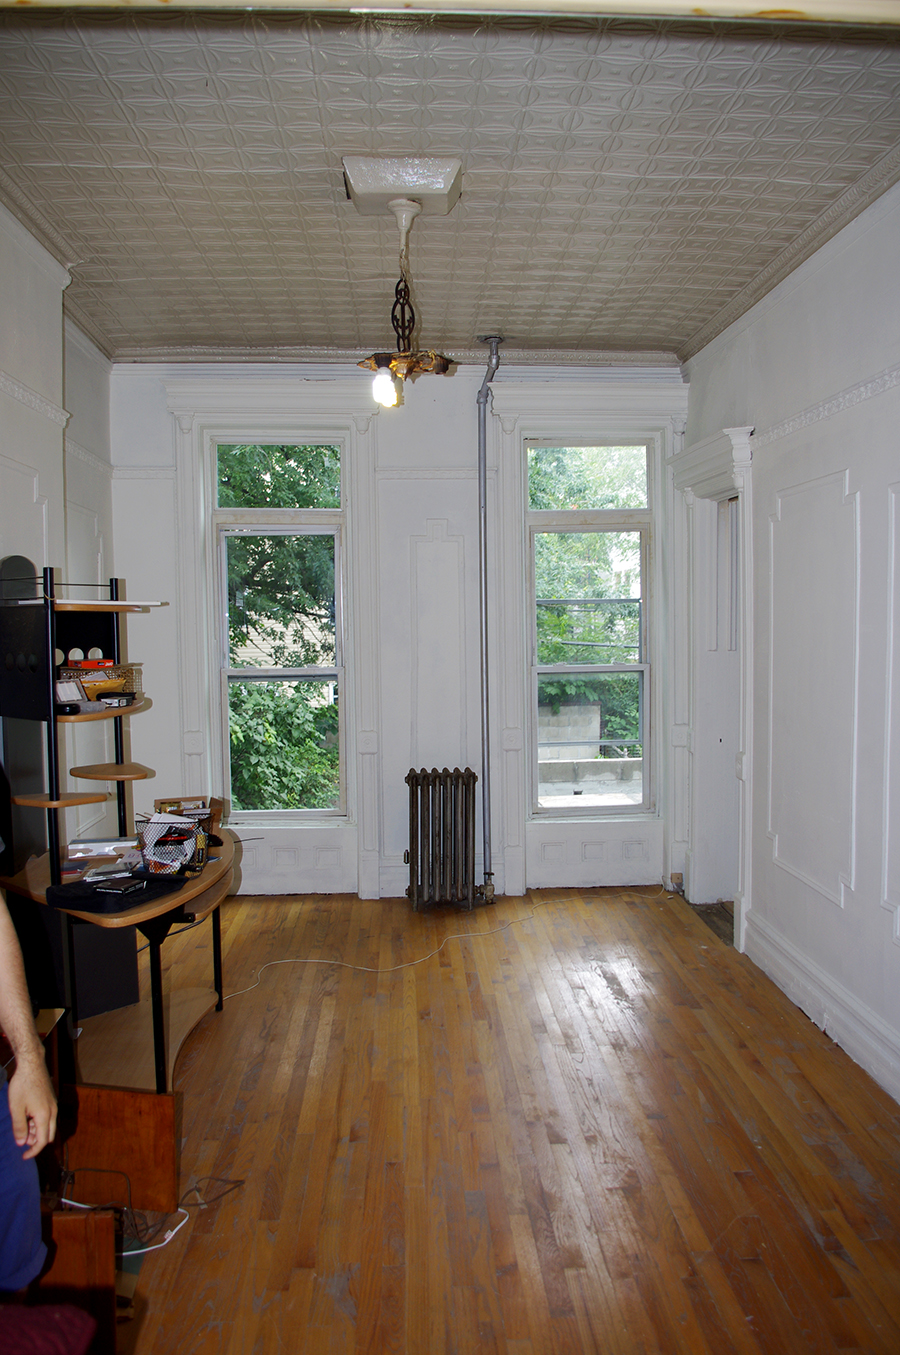
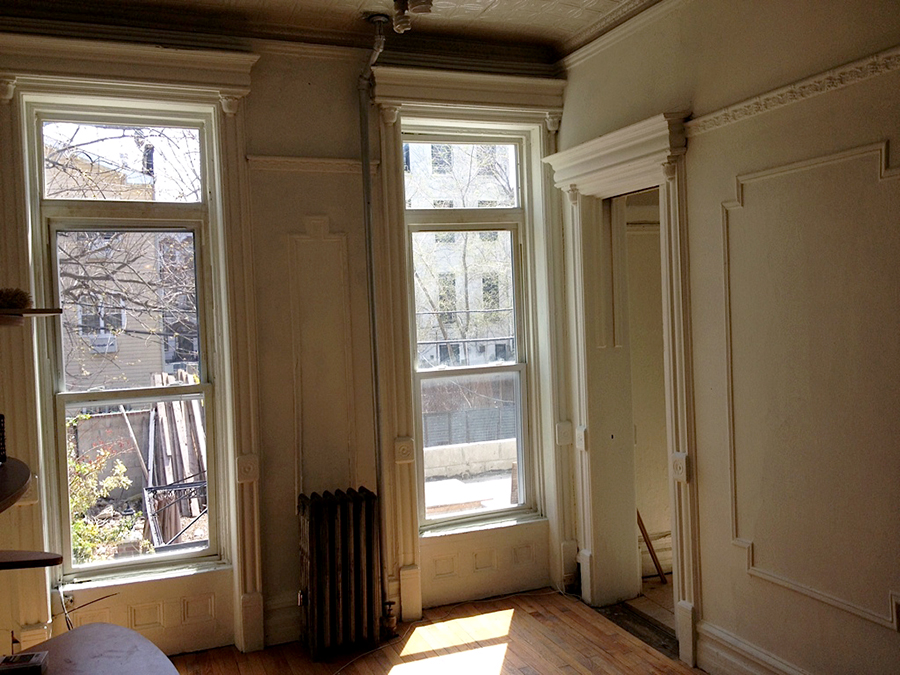
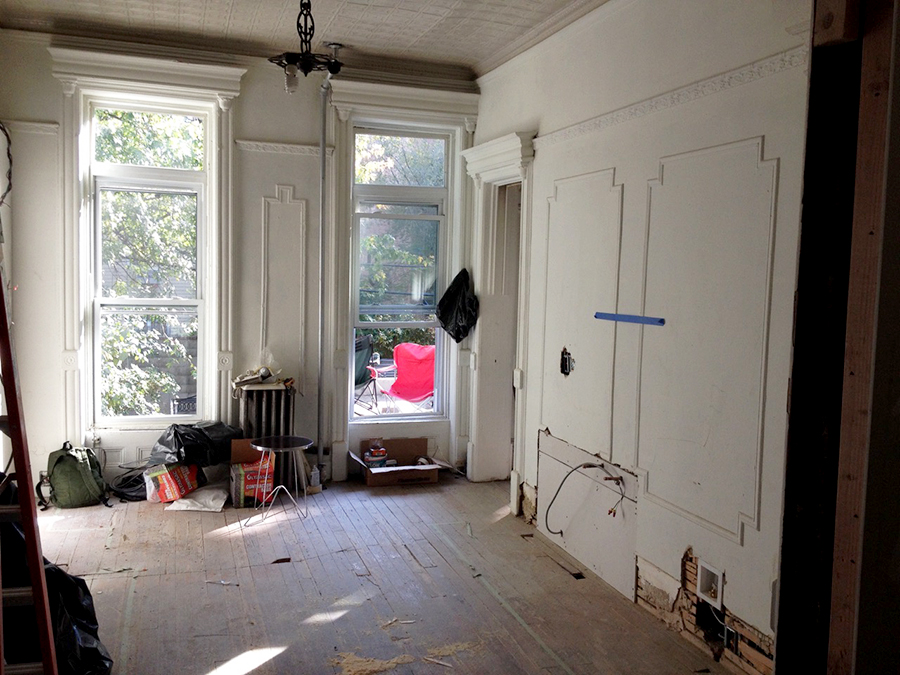
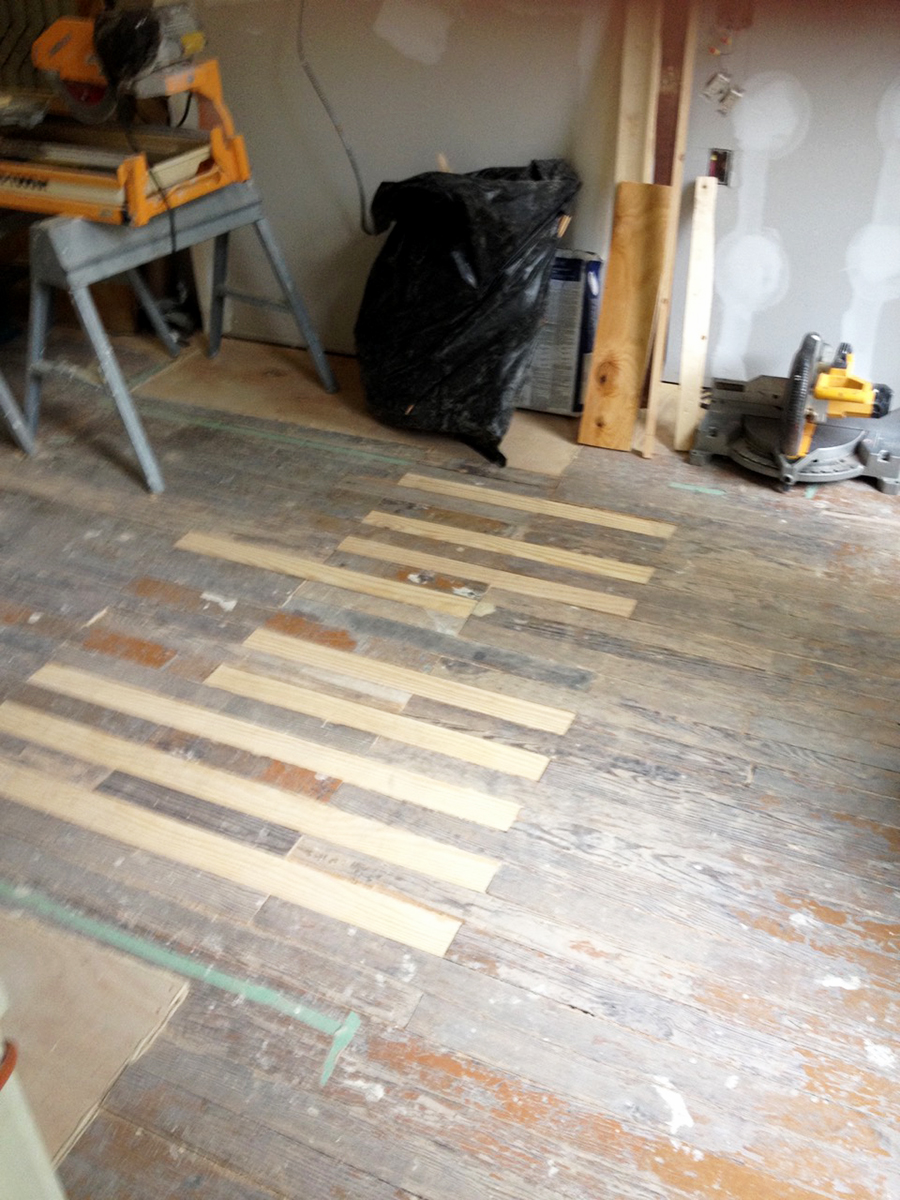
Let’s take a look at the room where our kitchen would be when we bought the house. This first shot is looking out to the backyard. Note the tin ceiling, picture moulding and light fixture. The floor was actually somewhat new, but we pulled it up, as the original floors were still underneath.
The light fixture we ended up removing, restoring, and putting in one of our upstairs bedrooms. As for that box you see on the ceiling—it was and remains a mystery. It’s where the electrical is for the ceiling lighting, but we’re not sure why it drops down like it does. What we do know is that the tin (while old) wasn’t original to the house, and that the house originally had gas lighting. So, we’re thinking it was some kind of necessary modification when electrical wiring was run, and the tin ceiling installed.
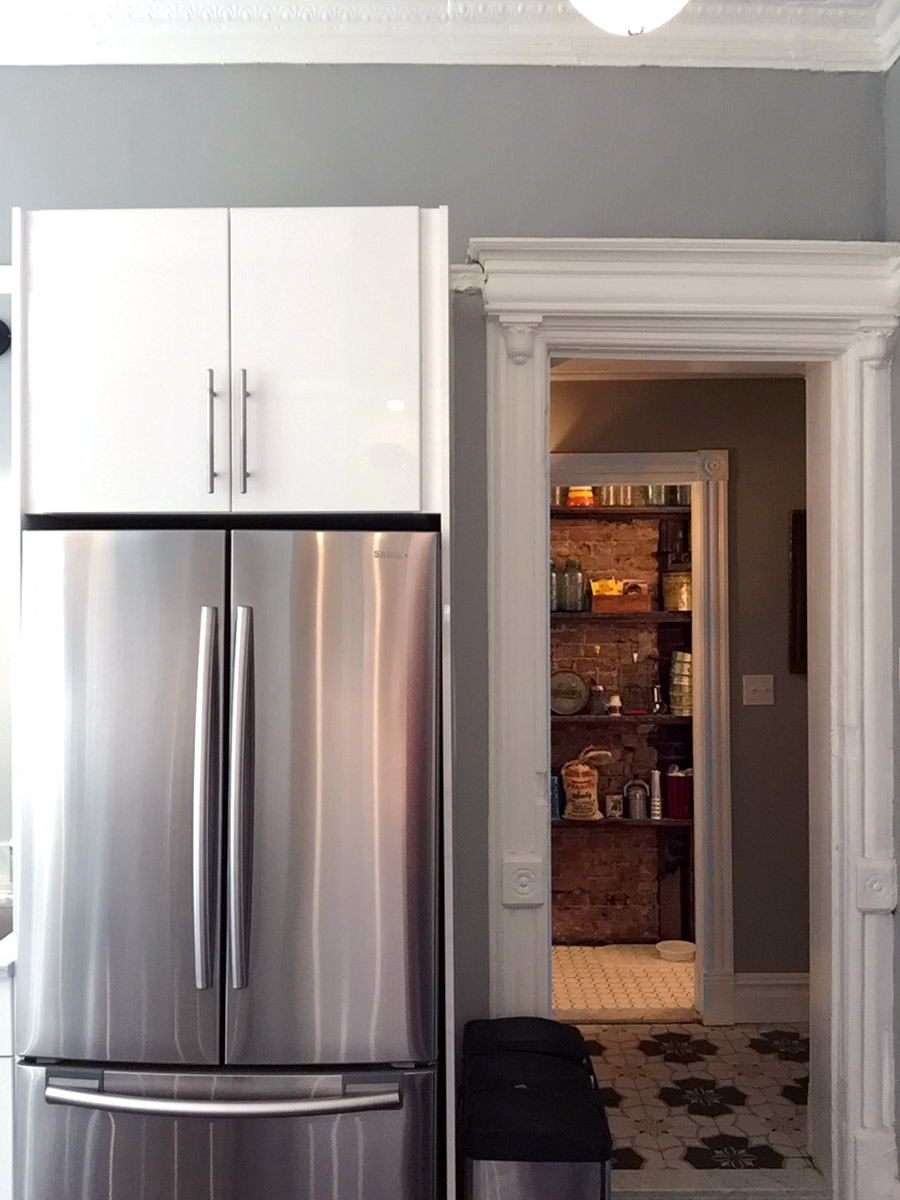
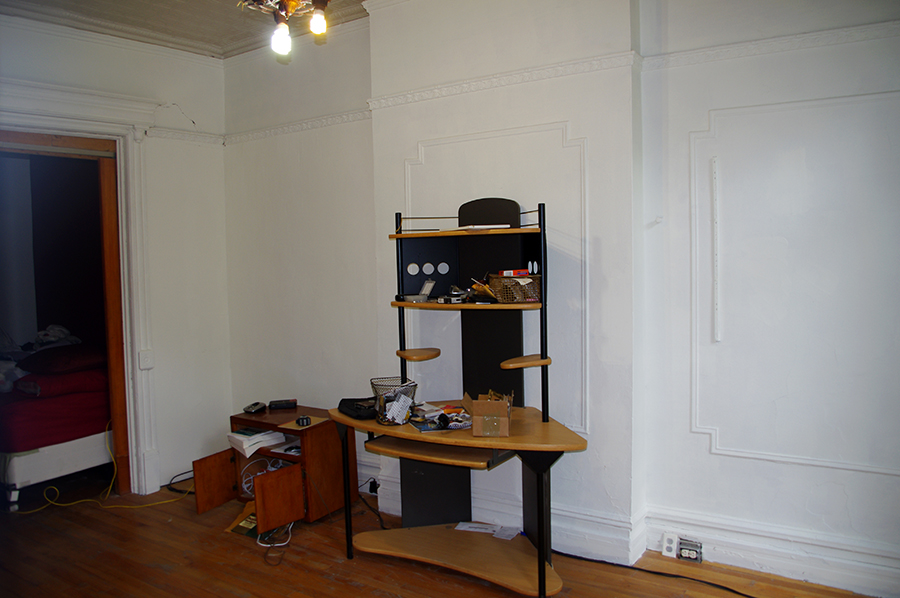
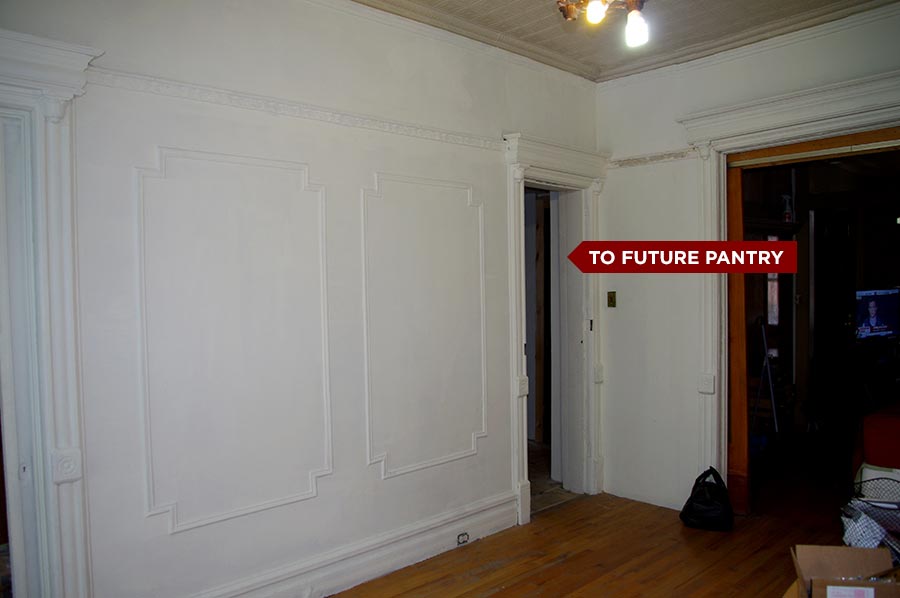
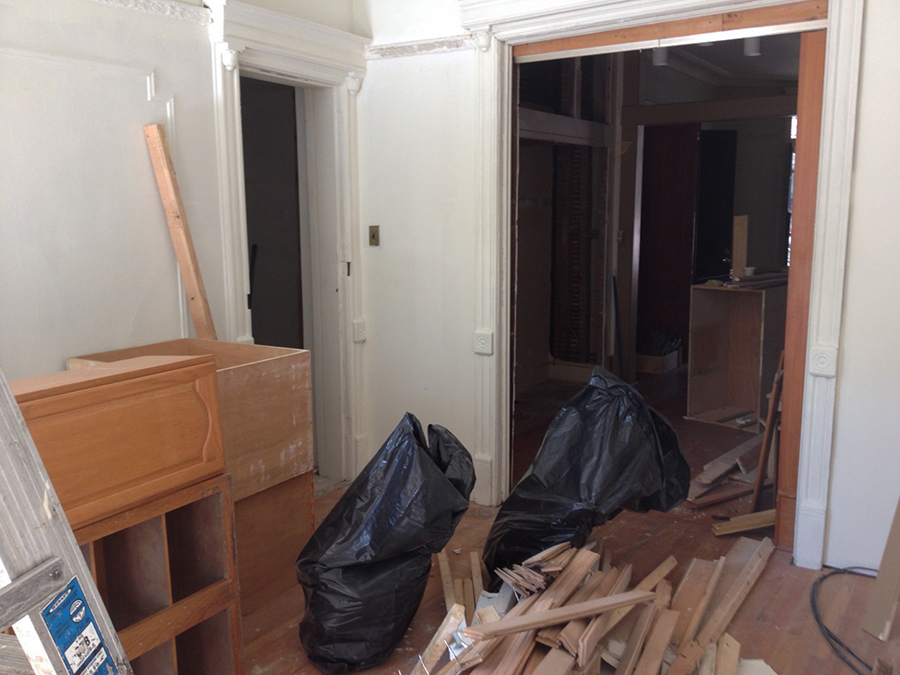
Here are views of the left and rights side of the room. Note the doorway that would lead to our pantry.
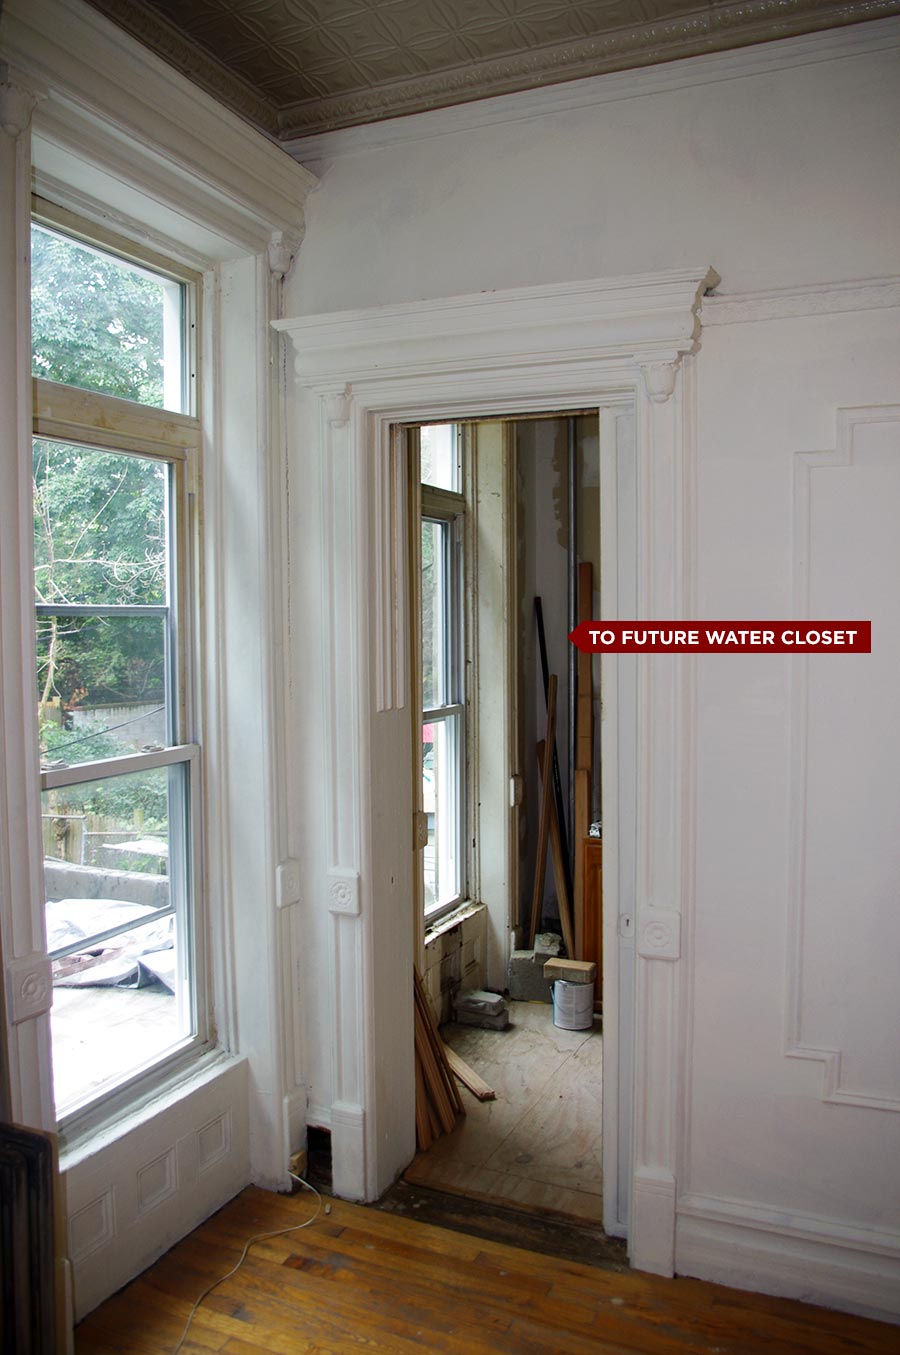
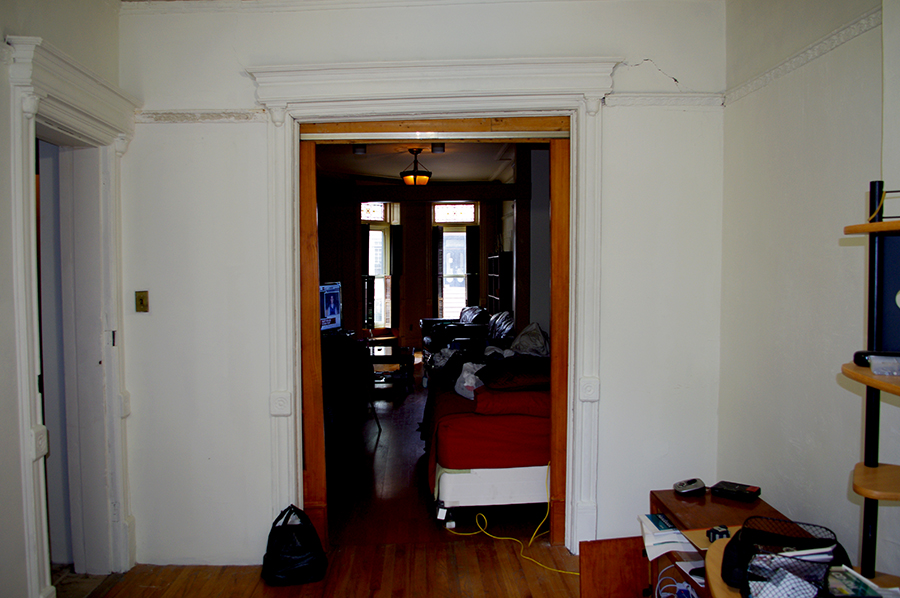
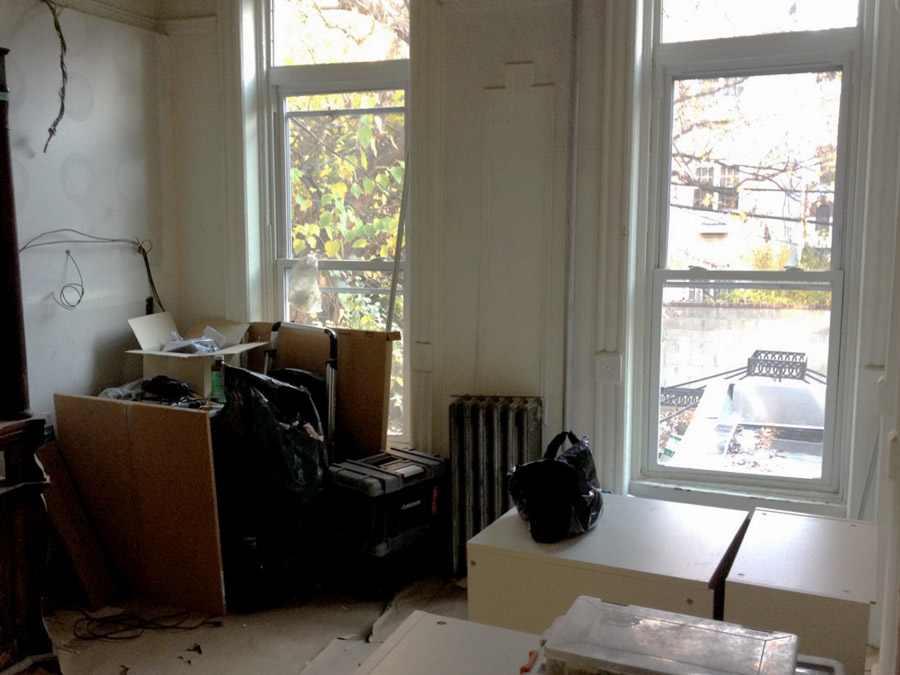
In these shots, the doorway leads to what would later become our water closet. Note that the window in the next room was switched out for a door so that we could access the roof of the back room which became our terrace and access to the backyard.
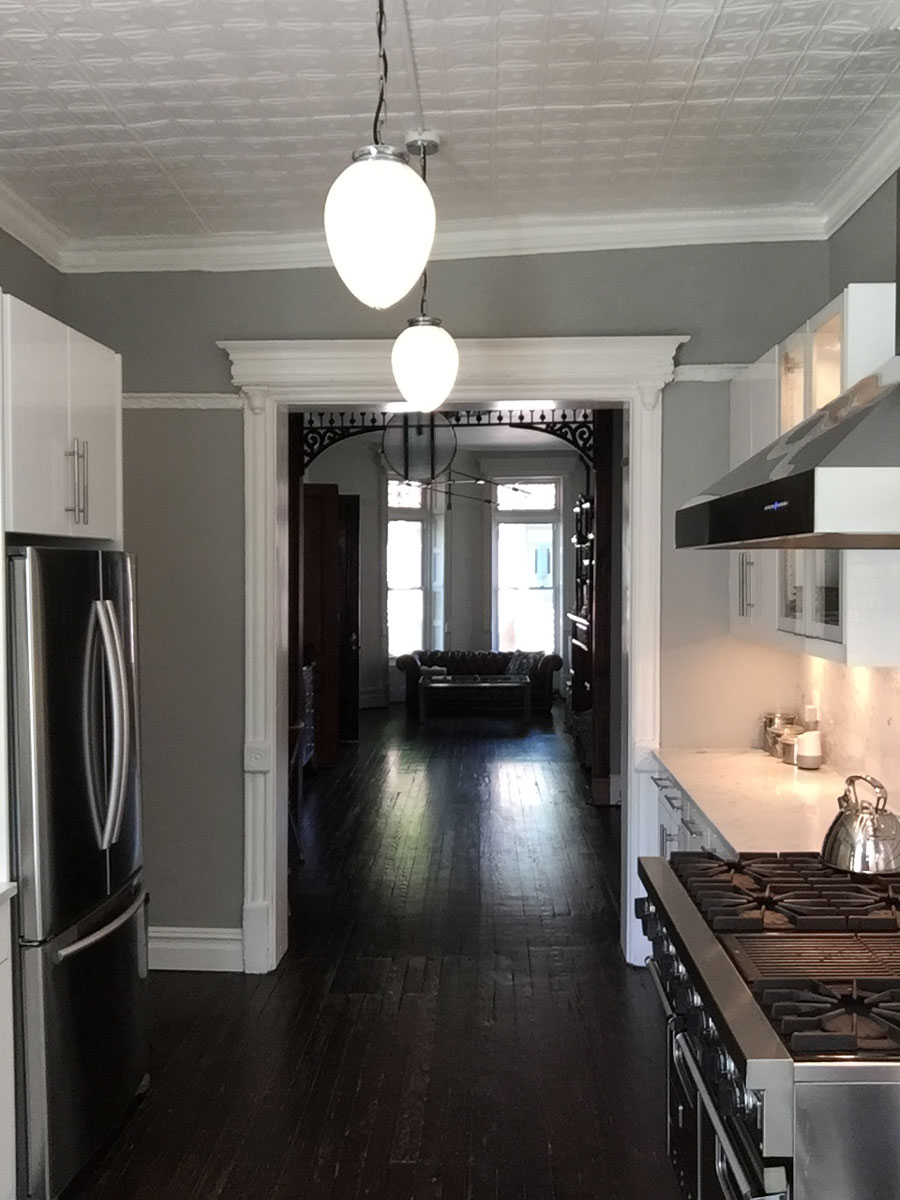
In this final shot, you’re standing in the future kitchen, looking through what would become our dining room and into the living room at the front of the house.
Design
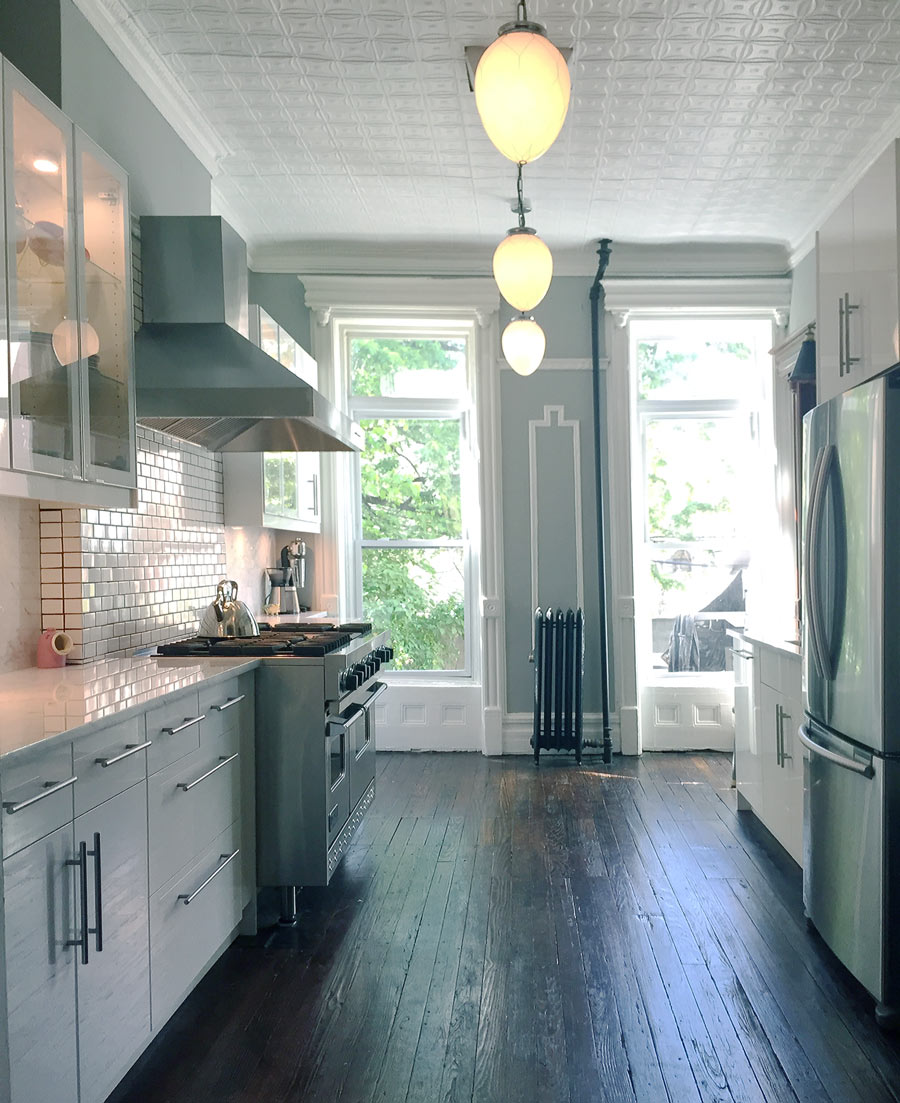
After a reconnaissance trip to IKEA, we decided on their since retired Akurum kitchen in bright, Lidingo white and stainless steel pulls. As you’ll see, this is a modern cabinet design which we intentionally chose so that it would contrast the older elements of the room and house.
While you can design and purchase an IKEA kitchen on your own, we decided to schedule an in-home IKEA planning session with one of their designers. At only $199, it was a pretty good bargain considering they actually came to the house, took all the measurements, drew up the design, and were able to generate a shopping list for us to take to the store and buy the kitchen.
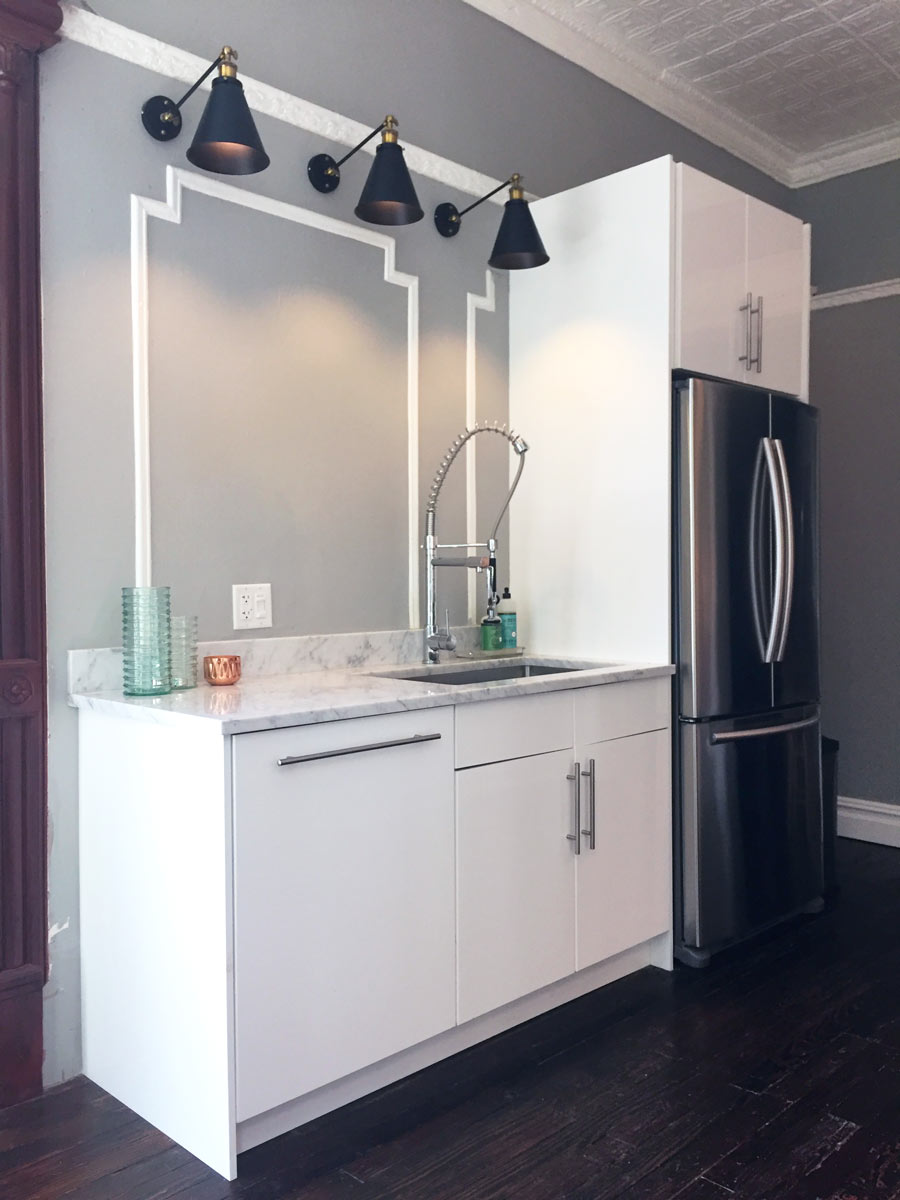
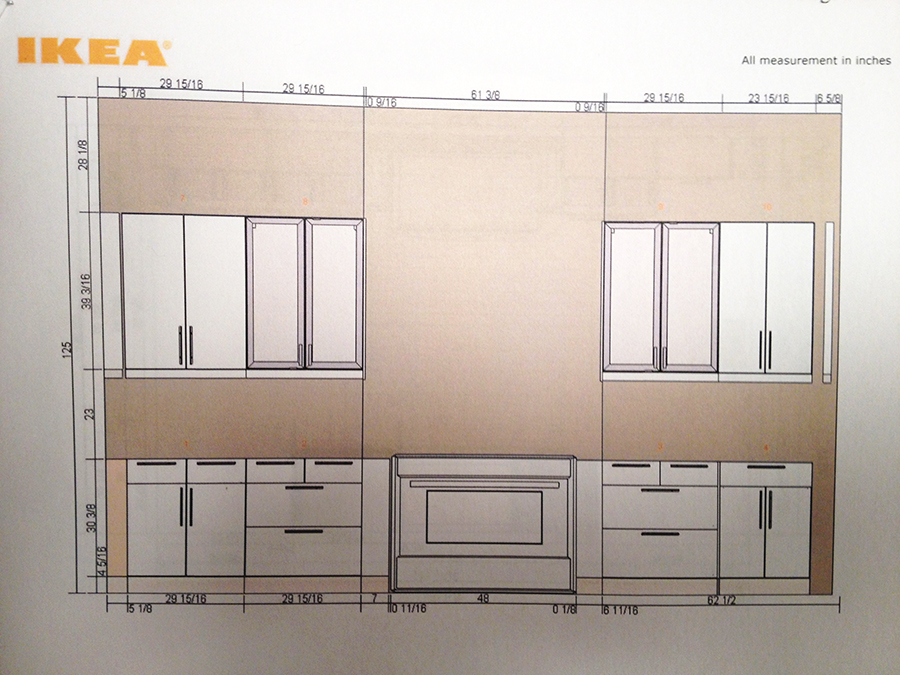
Here’s the design we came up with. If you’re standing in the kitchen and facing the back yard, this first diagram is to your right. The existing doorways needed to stay, but there was just enough room between them to fit a 33″ refrigerator, sink and dishwasher.
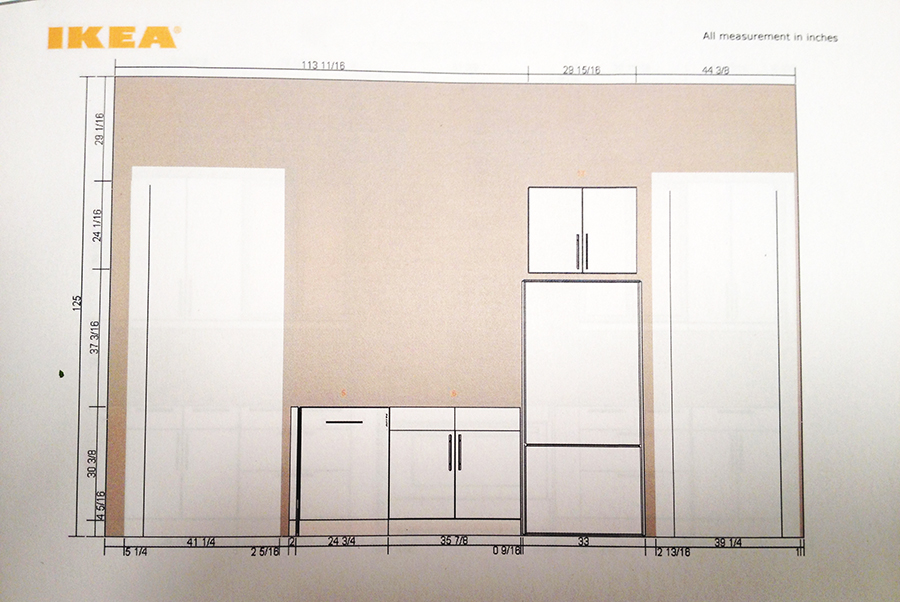
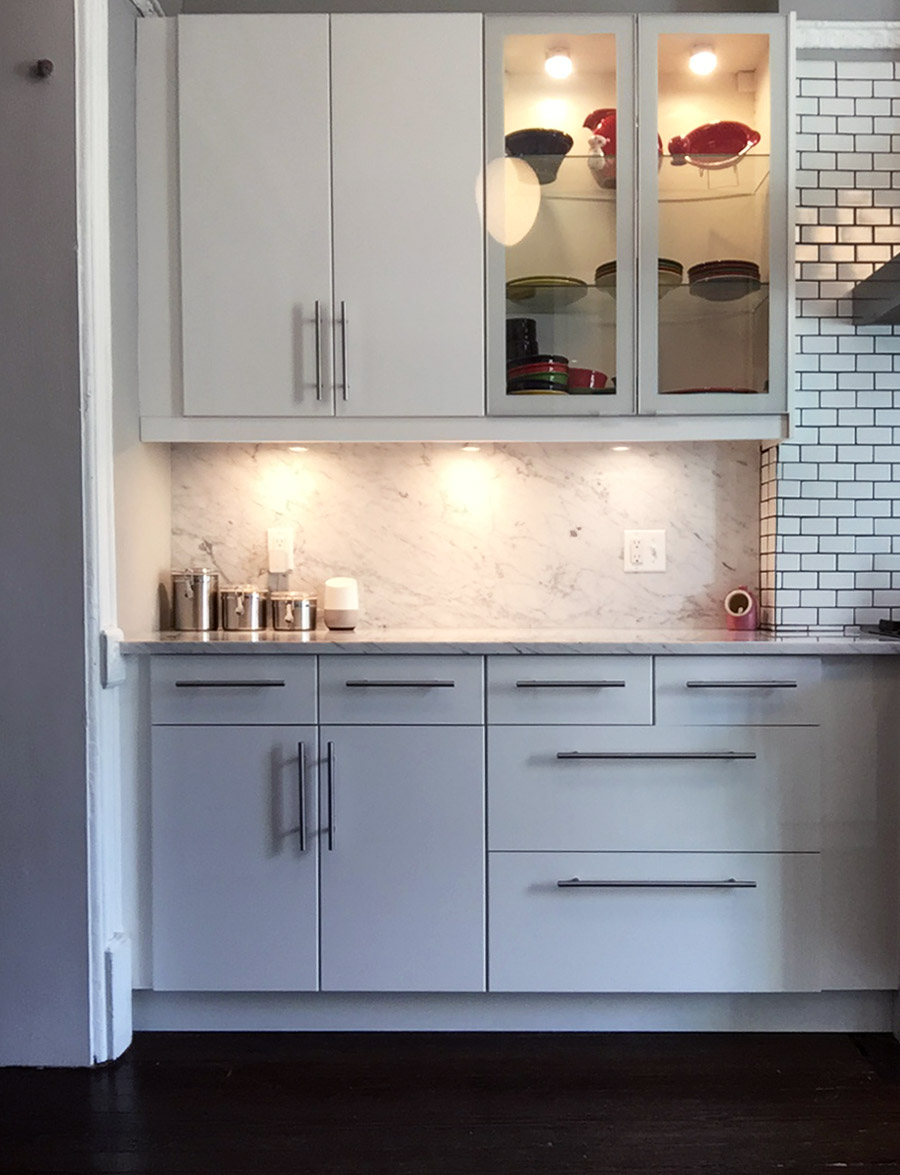
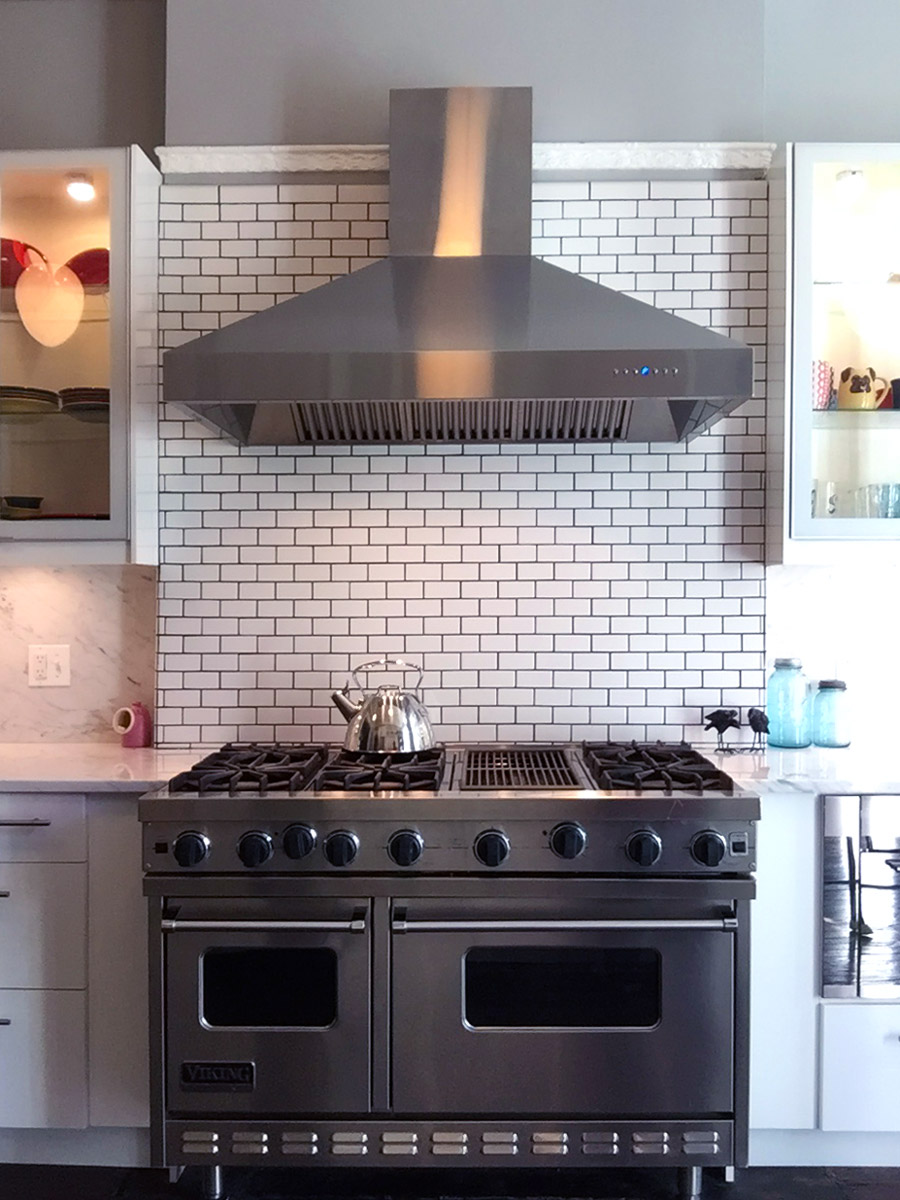
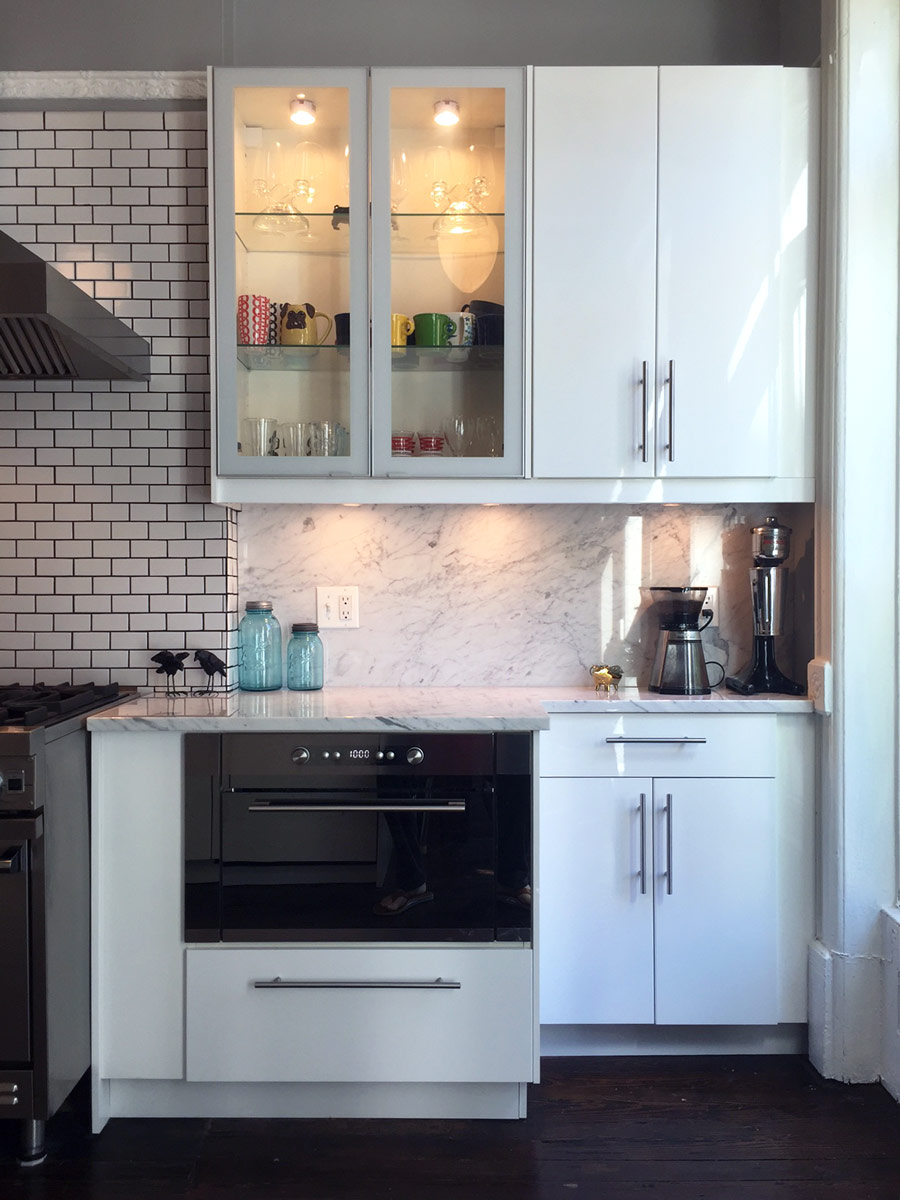
On the left had side was where the bulk of the cabinets would go, along with the stove (we had already decided we wanted a large stove to serve as a showpiece and focal point for the kitchen). In the design, we’ve allowed for a 48″ range with full sets of cabinets on either side. The upper cabinets to the right and left of the stove would have glass doors and interior lighting, while the rest of the cabinets would have under-cabinet lighting.
Countertops
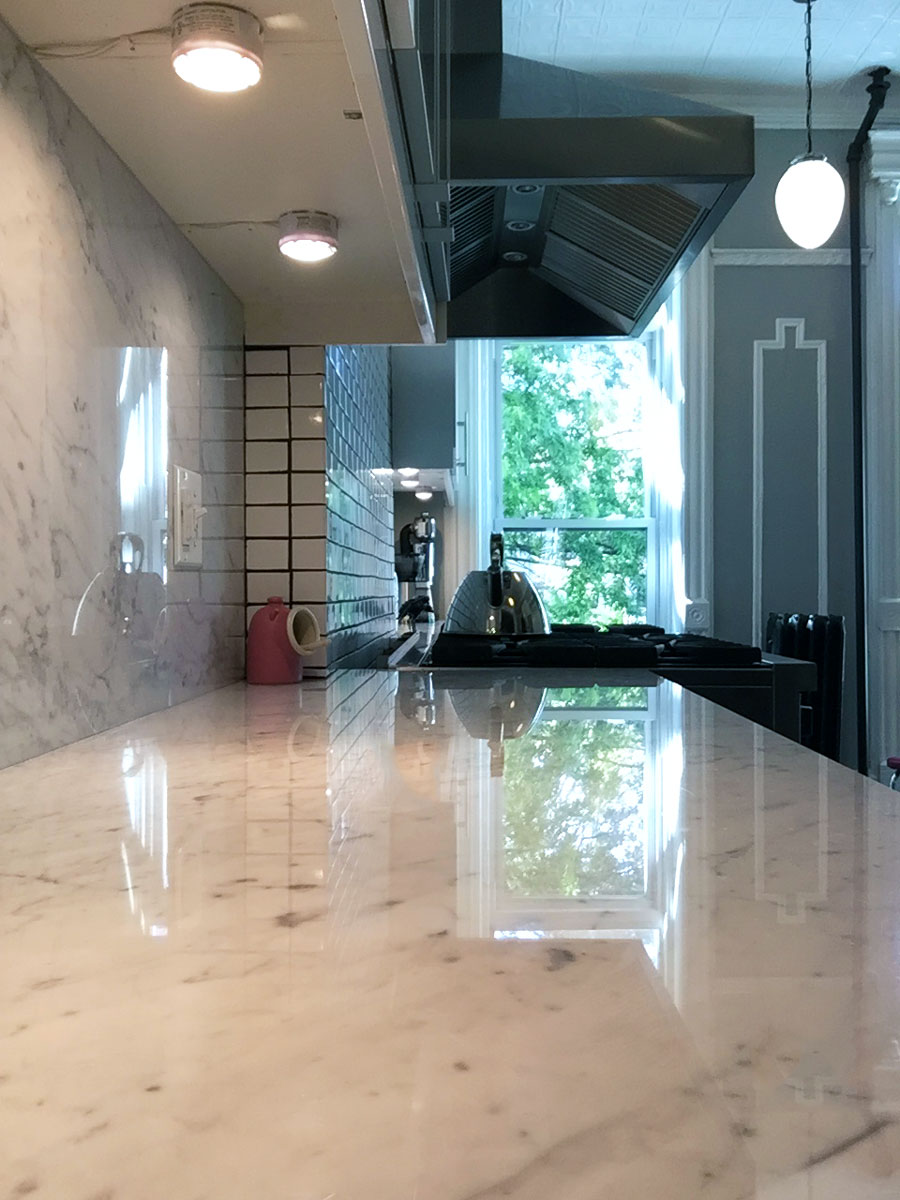
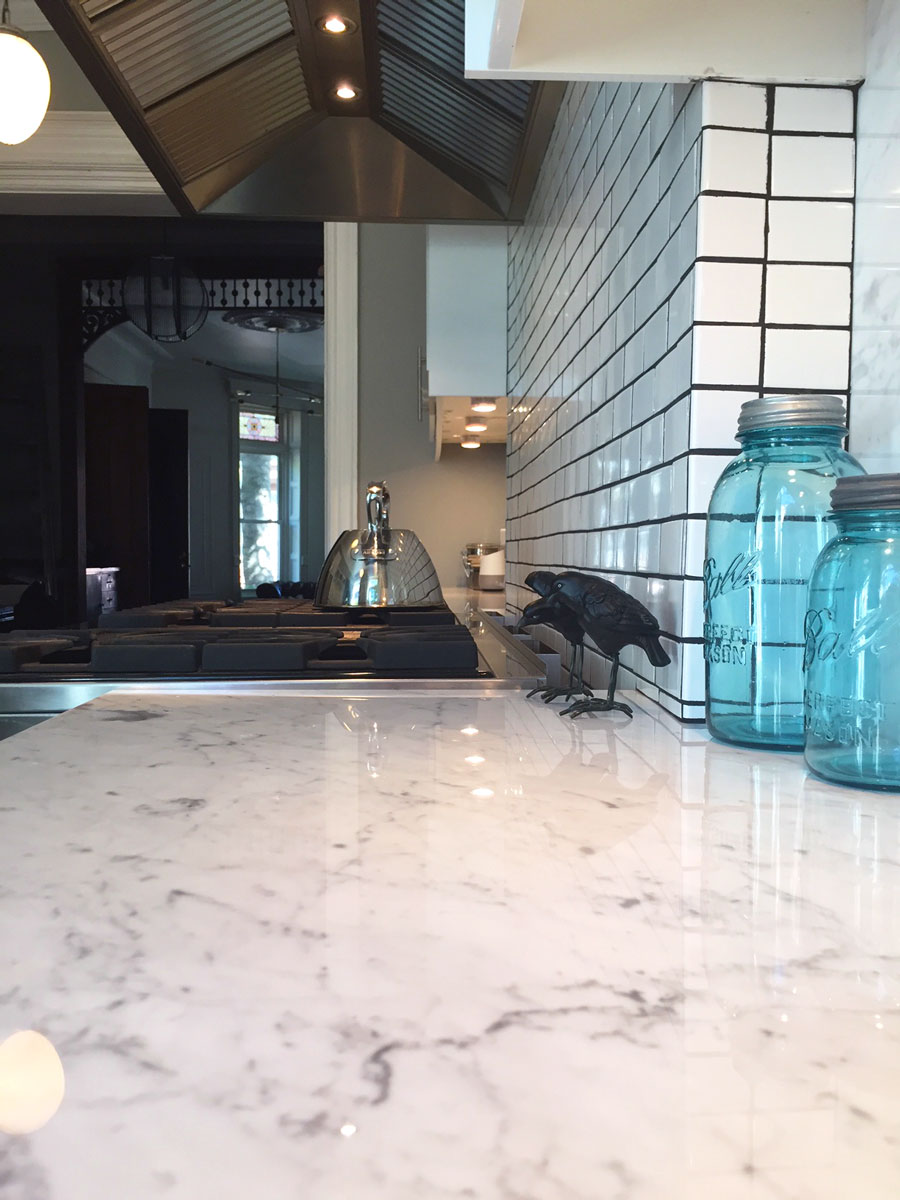
Our next challenge was selecting countertops. We decided on marble, which involved both shopping around for the best price, as well as selecting the perfect piece. Since marble is a natural stone, each slab is different, and the price is based on both the type of marble as well as its veining. And since it comes in slabs, you need to buy entire slabs regardless of how much of it you actually need. In the end we bought two slabs, as we needed enough for the counters as well as the backsplash.
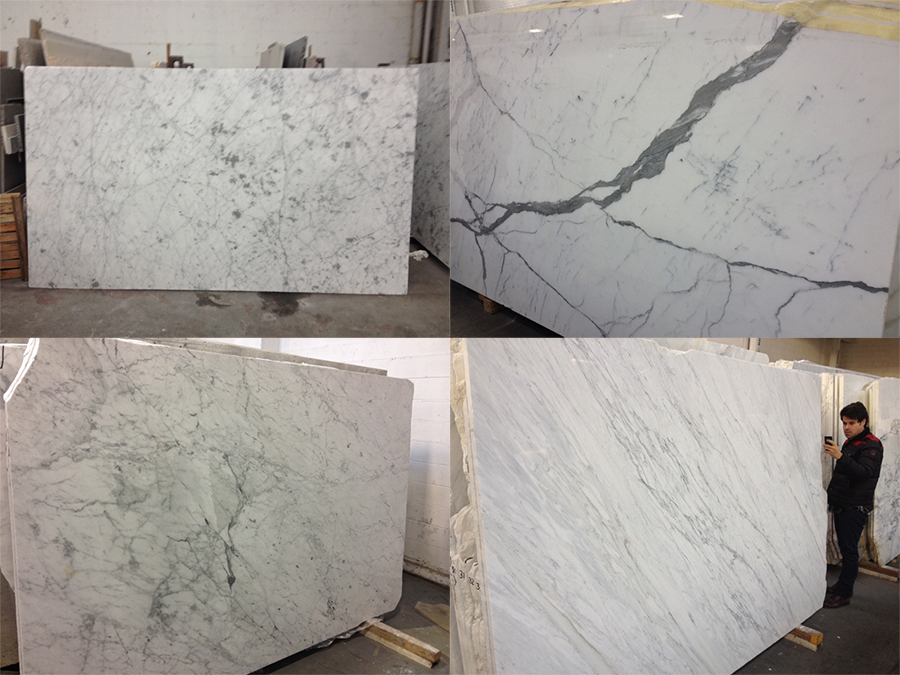
Here are some shots of a few of the slabs we originally considered. We really liked the one on the upper right but it was $$$, so we kept looking.
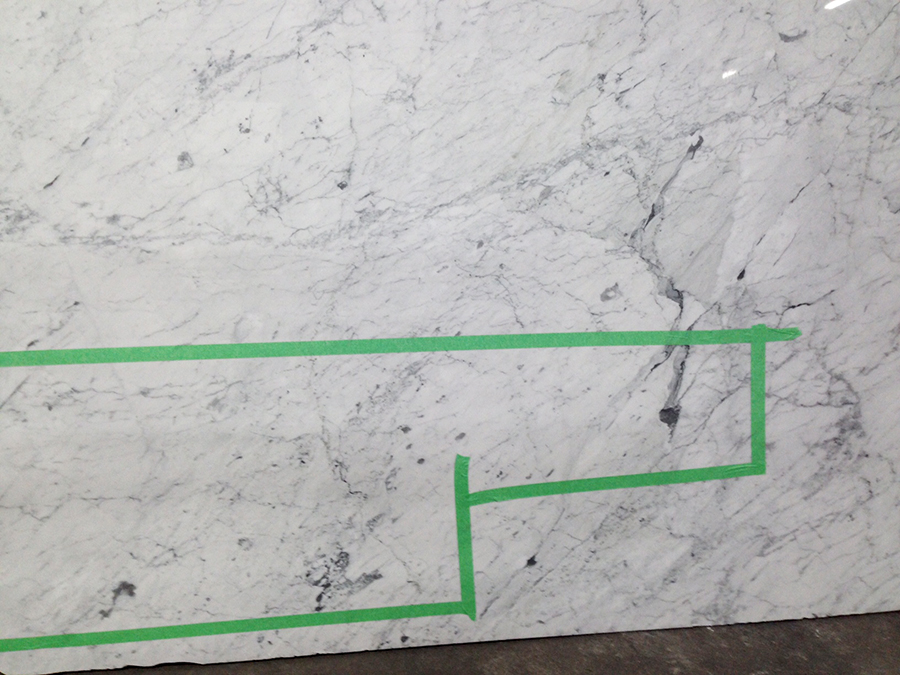
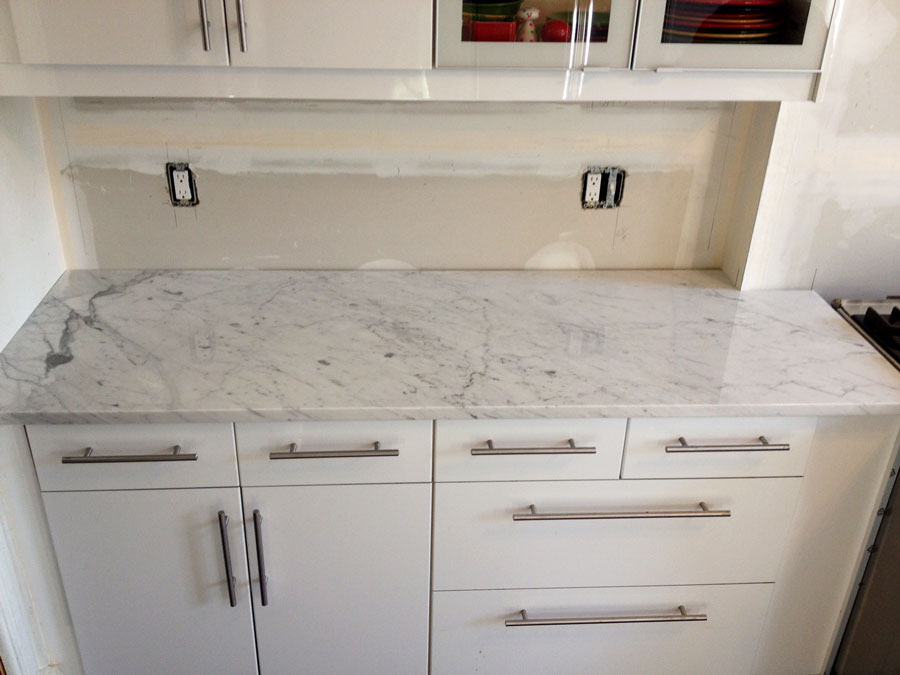
And this is the slab we ended up purchasing. The tape you see is where the manufacturer was beginning to plan where the individual counter pieces would be cut from the stone.
Room Prep
While we shopped for marble, our contractors began prepping the empty room to be our future kitchen. Gas and water lines were extended from the kitchen downstairs, and new electrical wiring added for all the necessary lighting and electrical outlets. We painted the walls (Coventry Gray from Benjamin Moore), and made some repairs to the floor before having them refinished.
Cabinet & Counter Installation
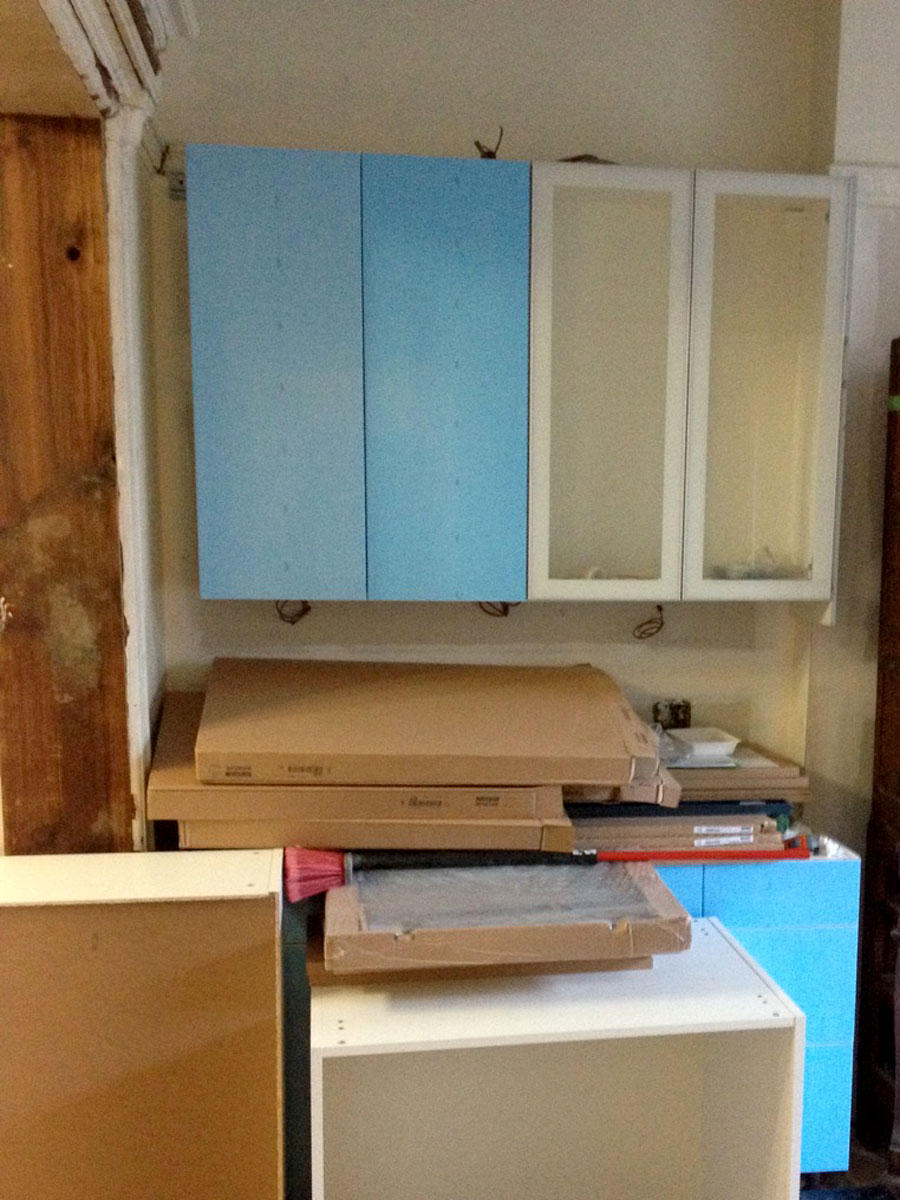
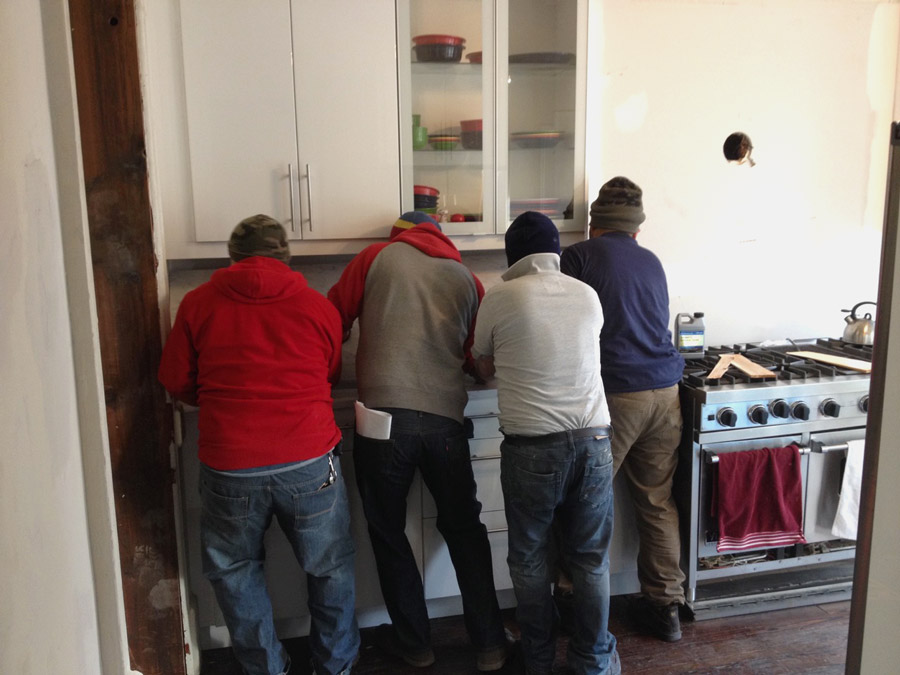
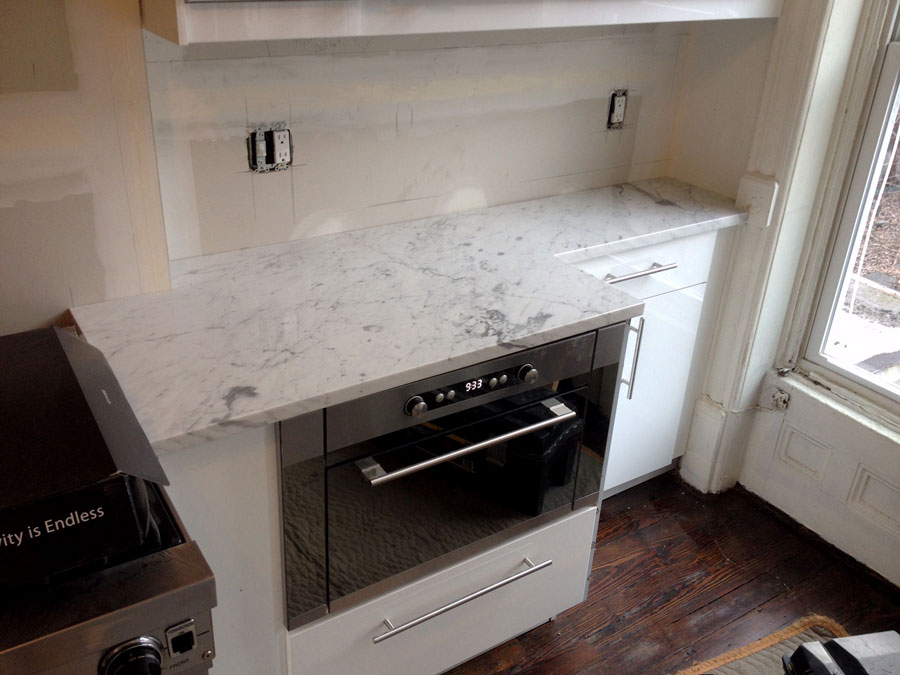
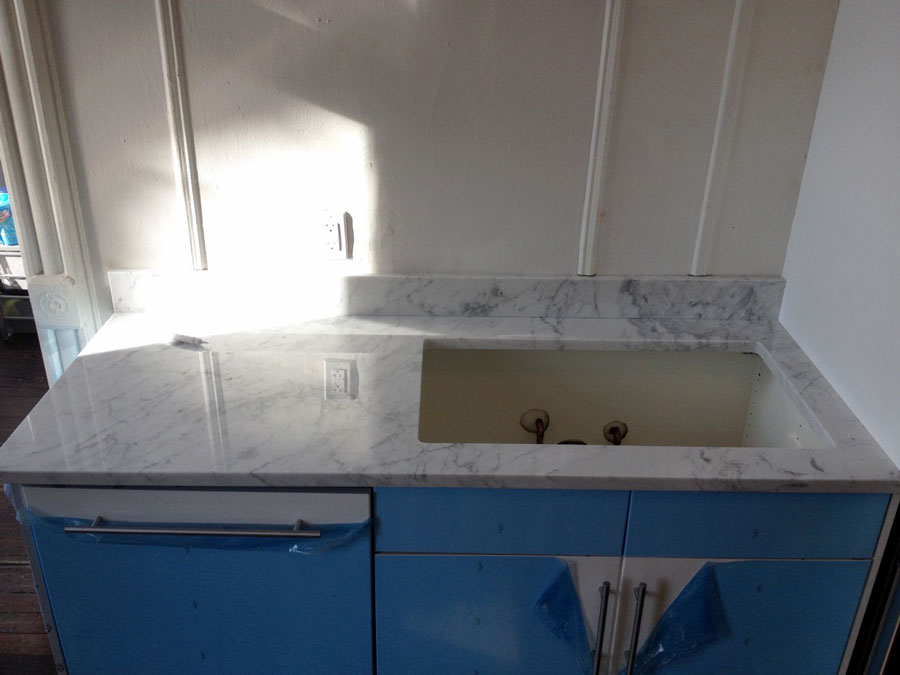
Once the room utilities were in place, we had the cabinets assembled and installed. The countertop fabricator then came to take measurements and draw templates for the counters and backsplash. About 3 weeks later, they came back and installed both.
Appliances
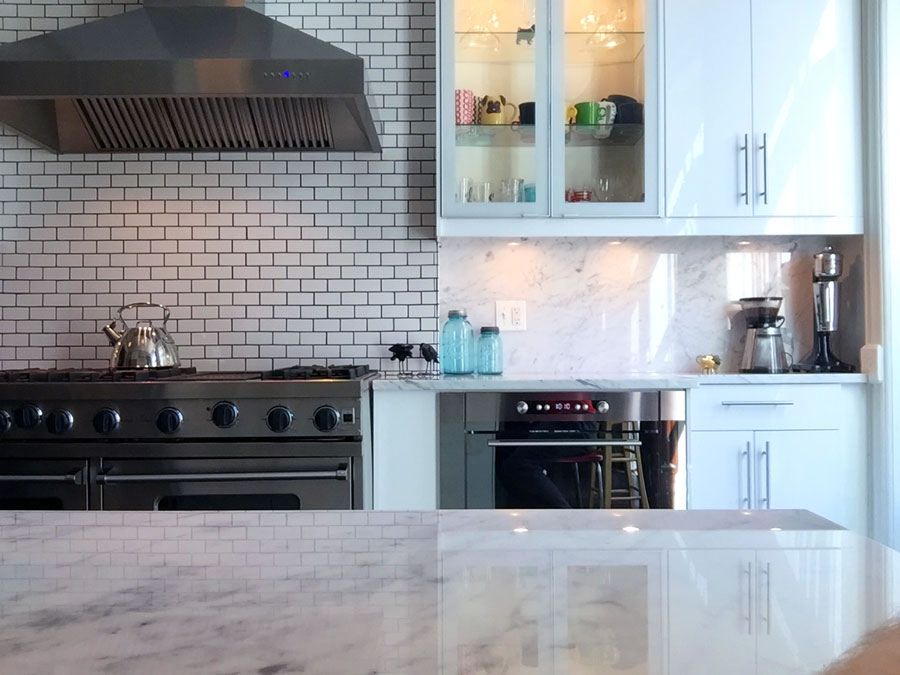
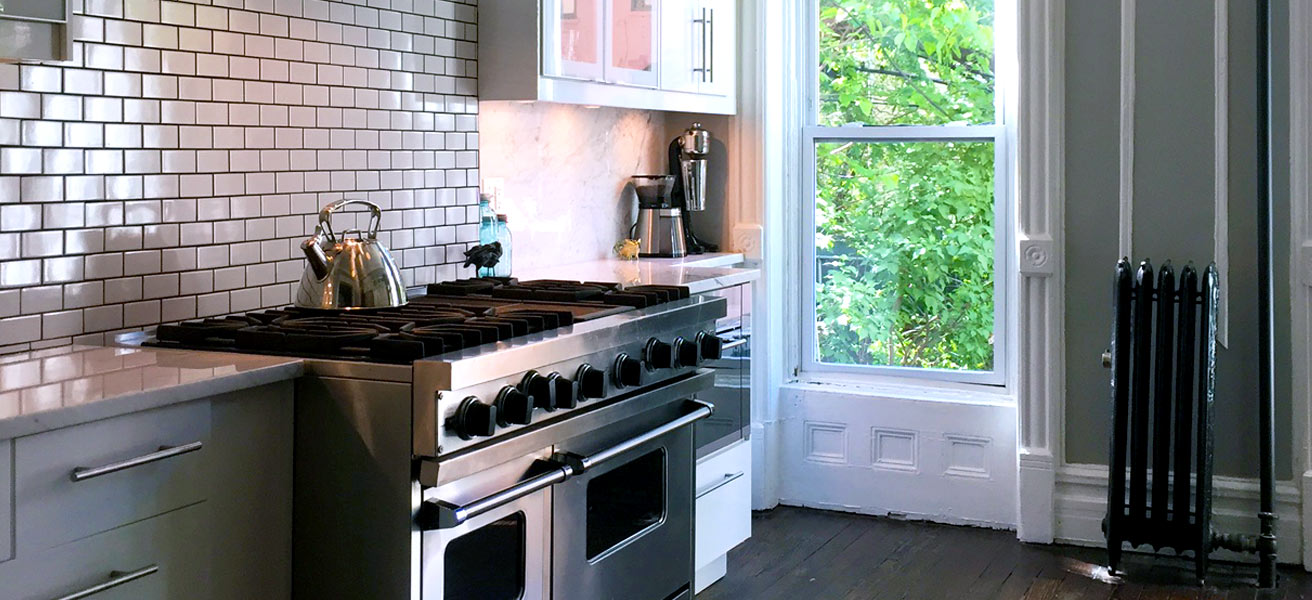
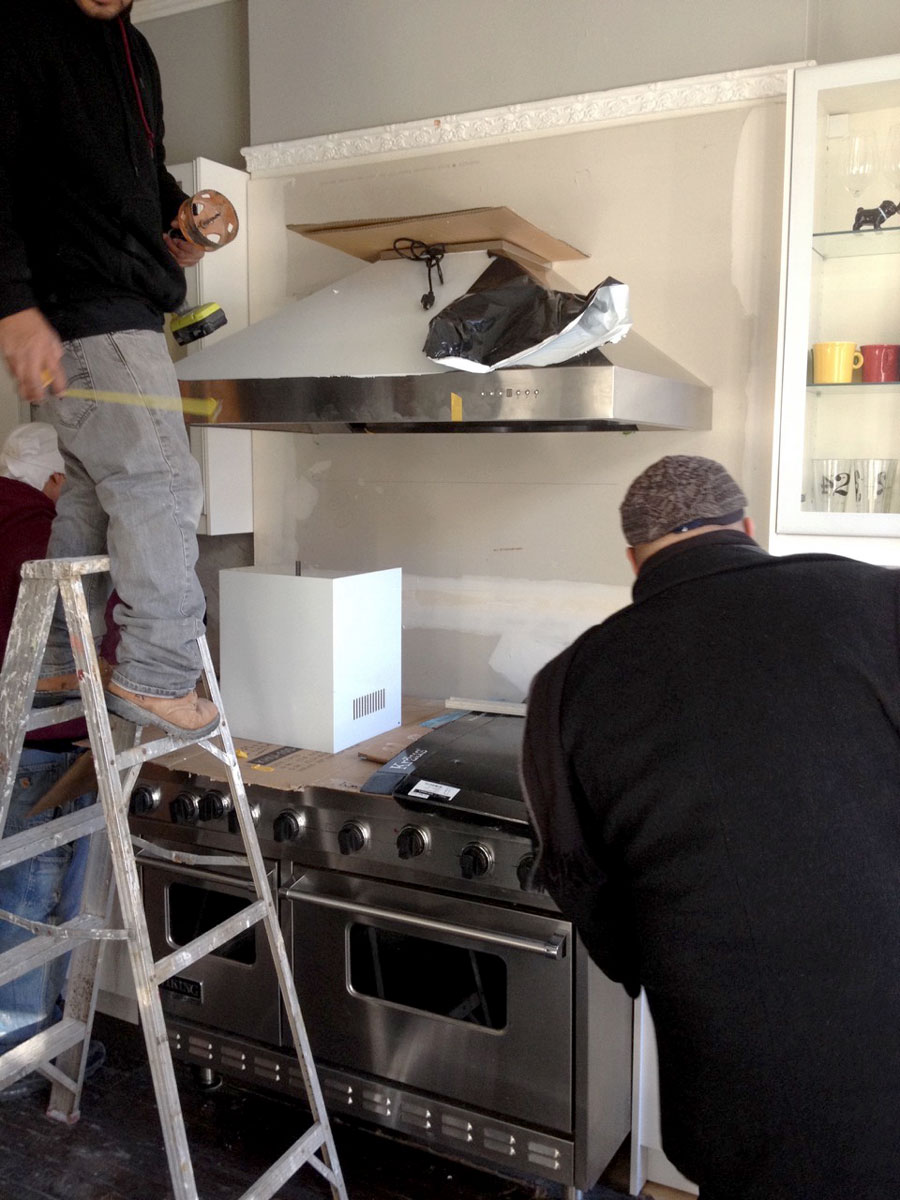
Sometime in the middle of all this, we purchased appliances. While we initially had Sub-Zero wishes and Thermador dreams, a reality (checkbook) check made us realize those funds would be better used elsewhere since we had an entire house to renovate! However, we had already decided we wanted a fancy stove as we had designed the kitchen around a 48″ opening. Our solution to that? Craigslist! After a few weeks of looking, we found a used but beautiful 48″ Viking gas range for only $1,500. A similar, new model would have been well over 10k, so this one gave us the impact we wanted without impacting our budget.

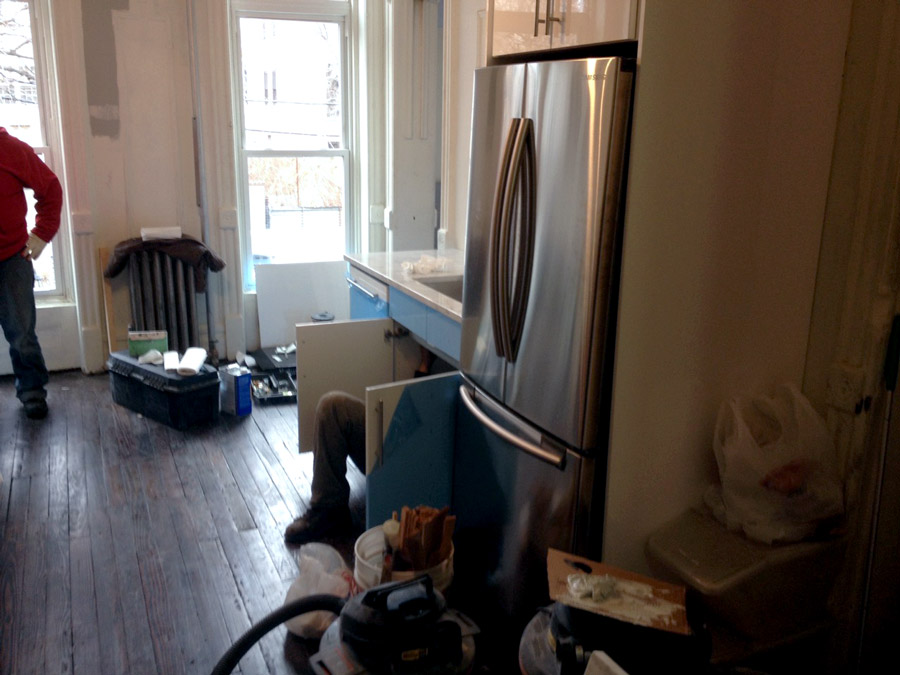
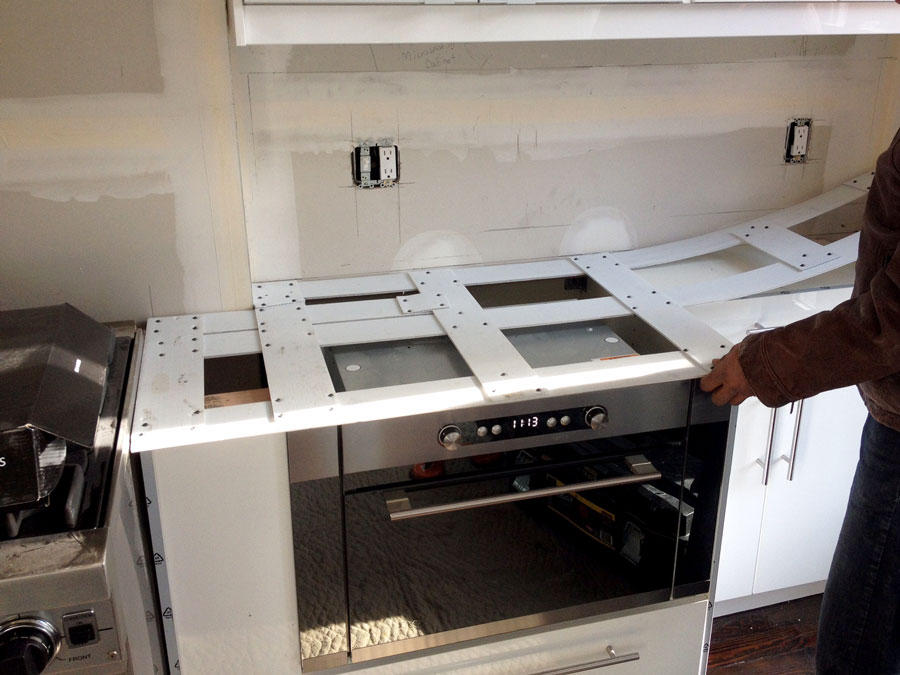
Once the cabinets, counters and appliances had been installed, we moved into our part of the house and were actively using the kitchen. However, it still wasn’t finished, as the backsplash behind the stove still incomplete. Our plan had been to install white subway tile during the main kitchen renovation, but we decided to hold off as a way of deferring some costs until a later date. In the meantime, we had the range hood hung.
Finishing Touches
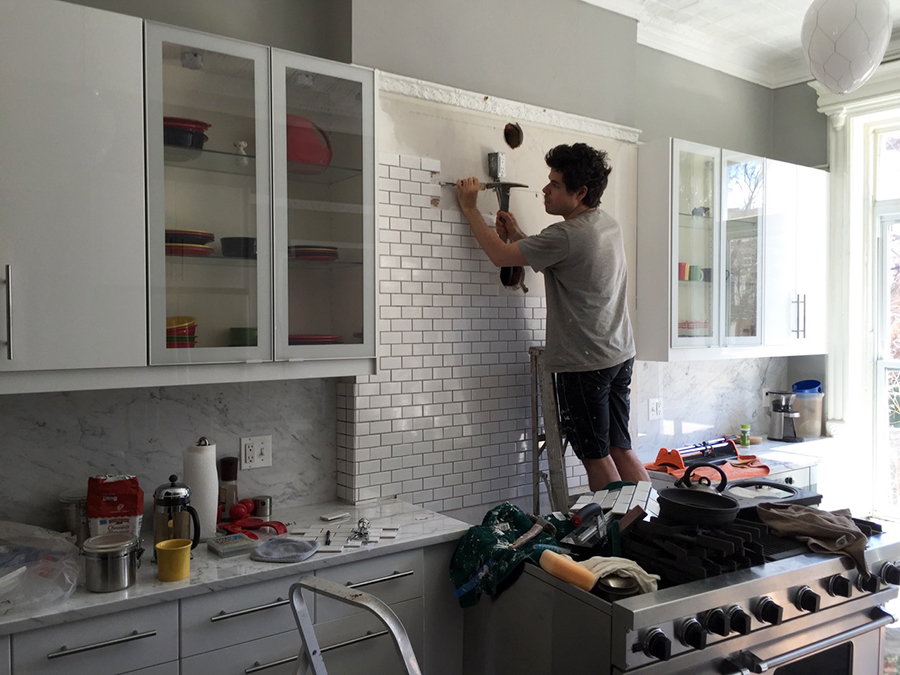
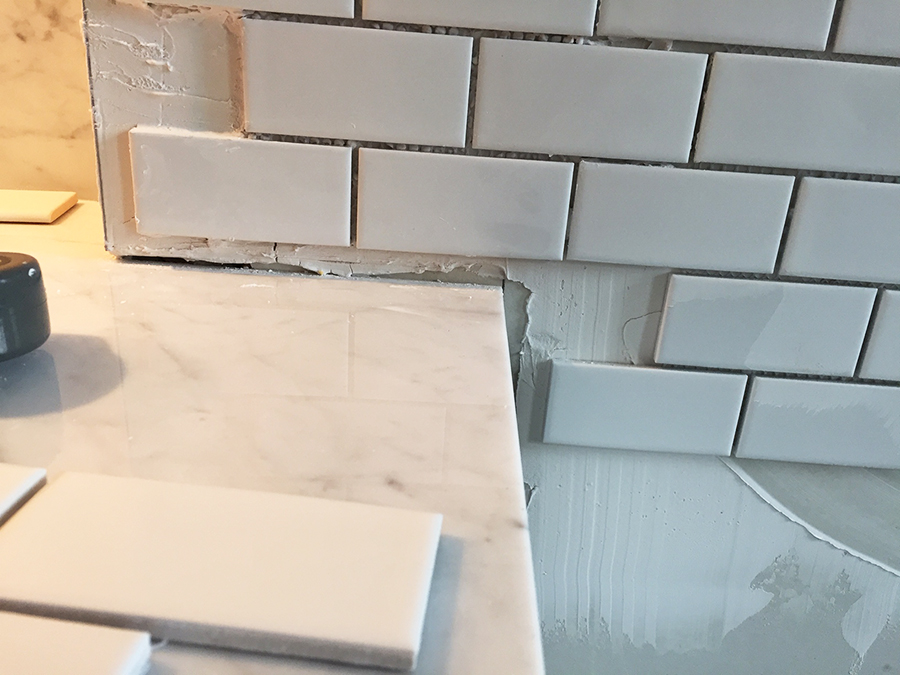
Fast-forward a year or so later, we finally got around to installing the subway tile. This required moving the stove and taking the range hood back down. We initially hired someone to do this work, but they bailed on us about a halfway through, so handyman James took it upon himself to complete the job.
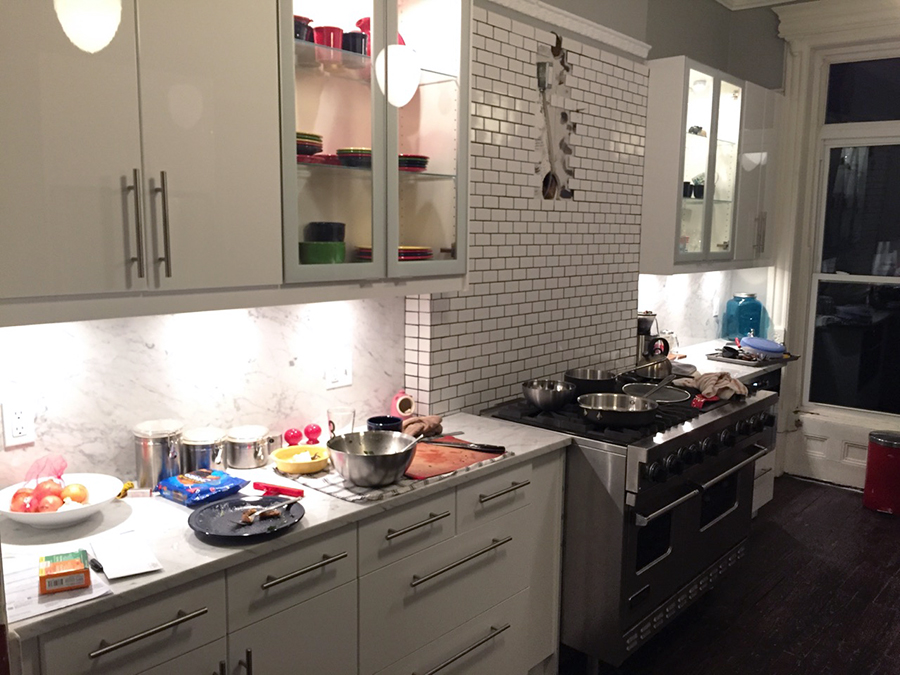
Once the backsplash was complete, it took us another few months to get around to putting the range hood back up. We also had the ceiling and over-sink lighting installed, both fixtures from Restoration Hardware.
Since then, we’ve officially declared the kitchen “finished” though there are still improvements we want to make. For example, note that the pocket door and door frame leading into the water closet have been stripped and refinished. Our hope is to eventually strip the moulding around the two windows too. But for now, have a look at our finished kitchen!