After we closed, the first order of business was to renovate the garden level, which we planned to use as a rental until. Basically, the sooner we got the garden level renovated, the sooner we could get tenants. And the sooner we got tenants, the sooner we’d get some income to offset the huge mortgage payment that stood ready to bleed us dry if we didn’t do otherwise!
After some consideration, the plan became to renovate the garden level while we were still living in our Park Slope apartment. Once complete, we’d move into the rental unit, which would get us out from under our rent payment— and put is on site to begin renovating the space we would live in upstairs.
Of all that had to be done on the garden level, the biggest project by far was the kitchen, and the focus of this first Renovation Rewind.
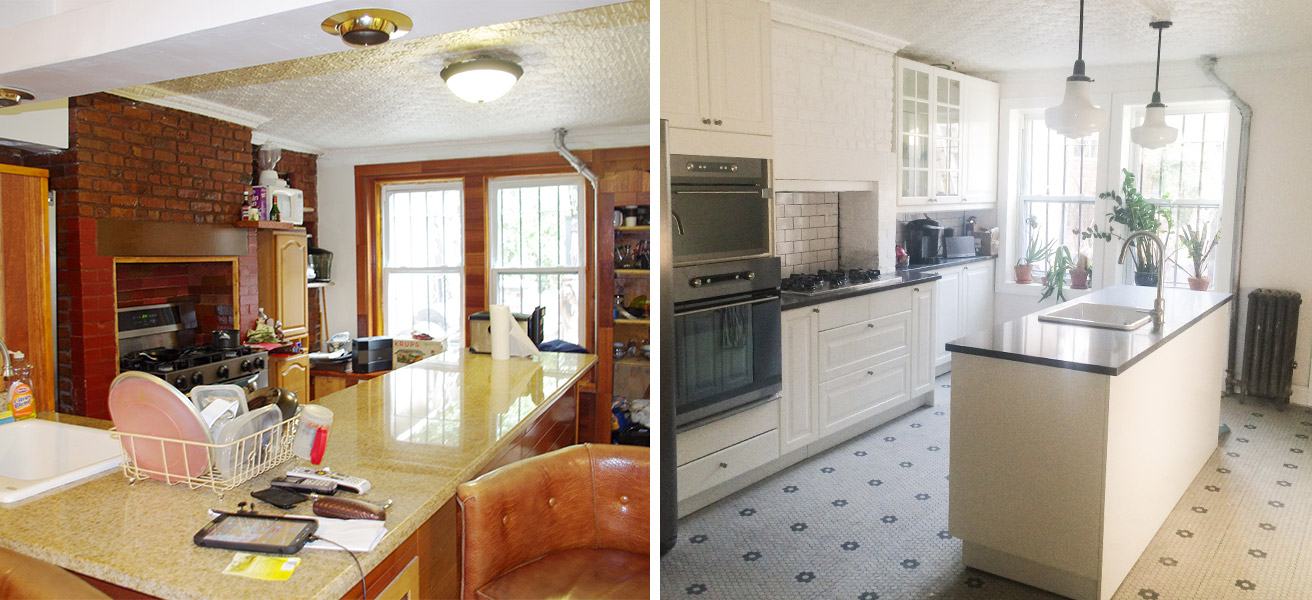
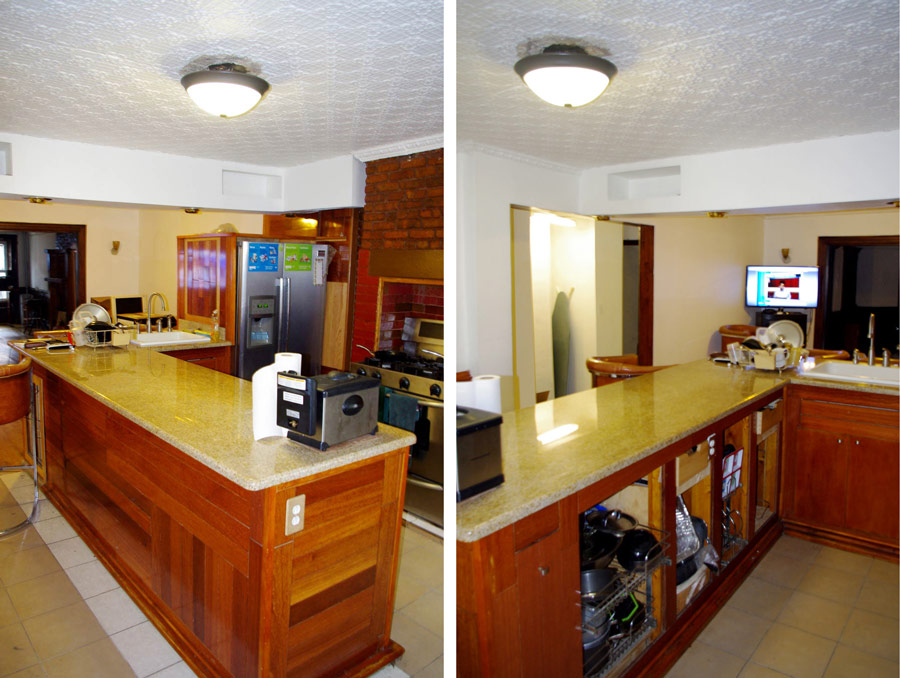
Before
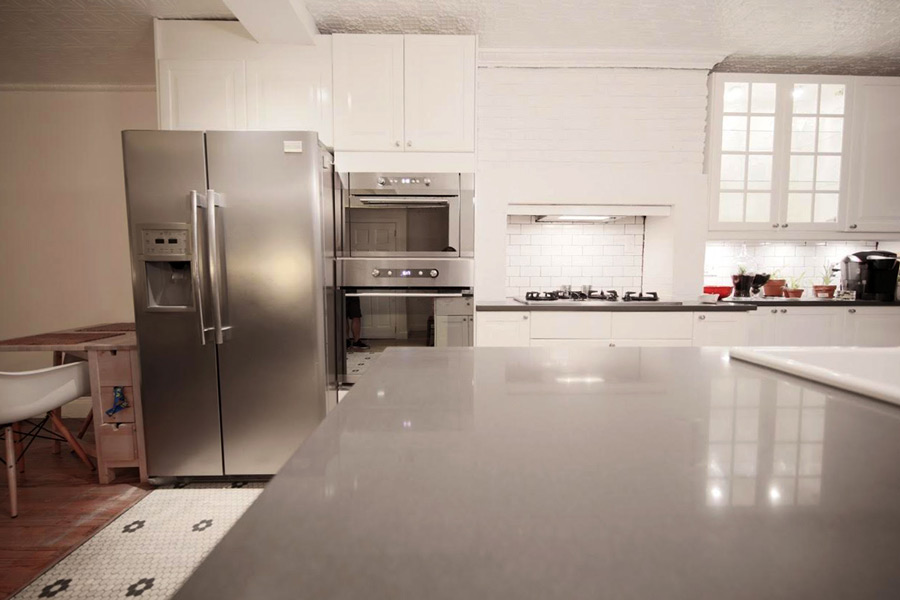
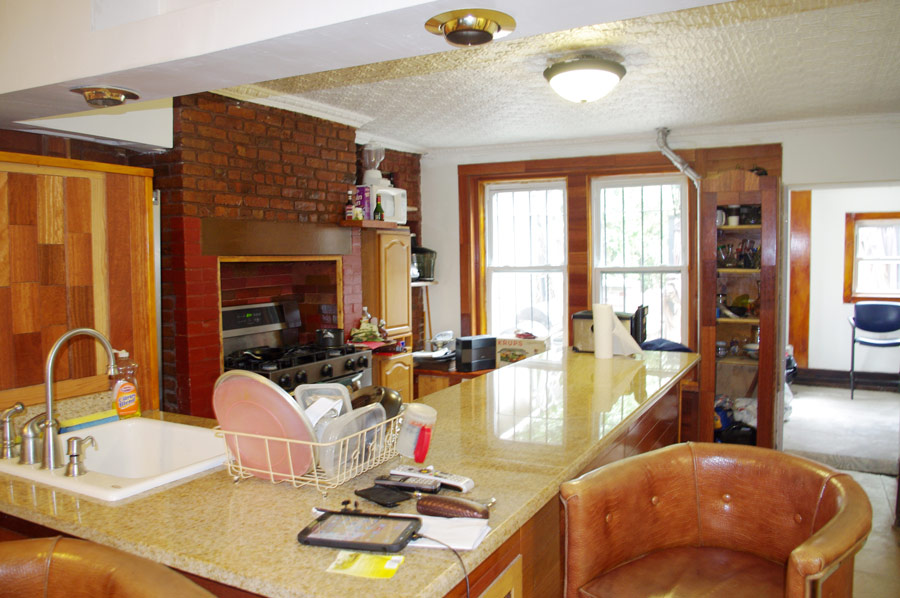
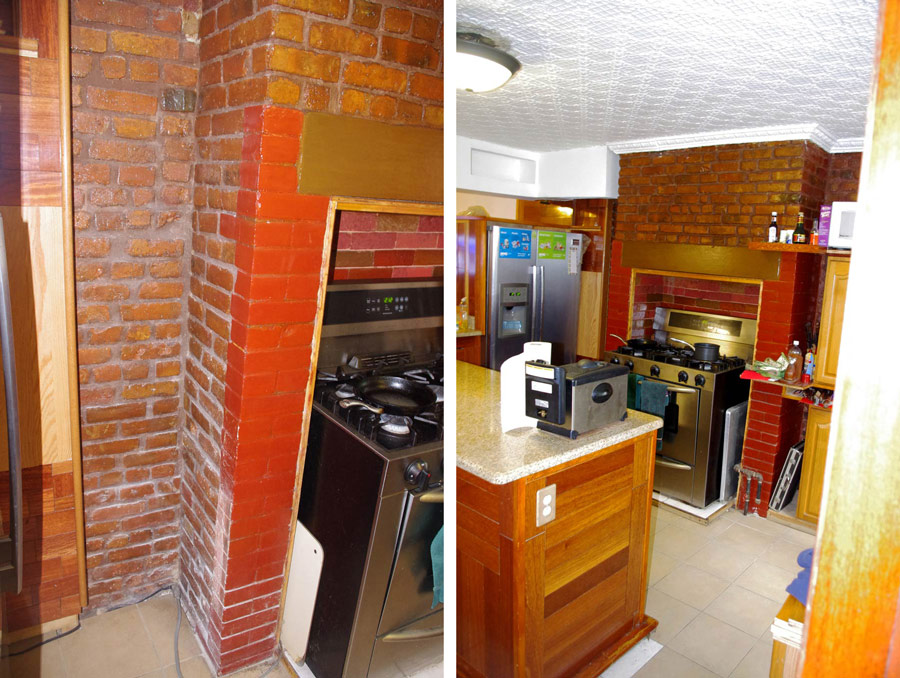
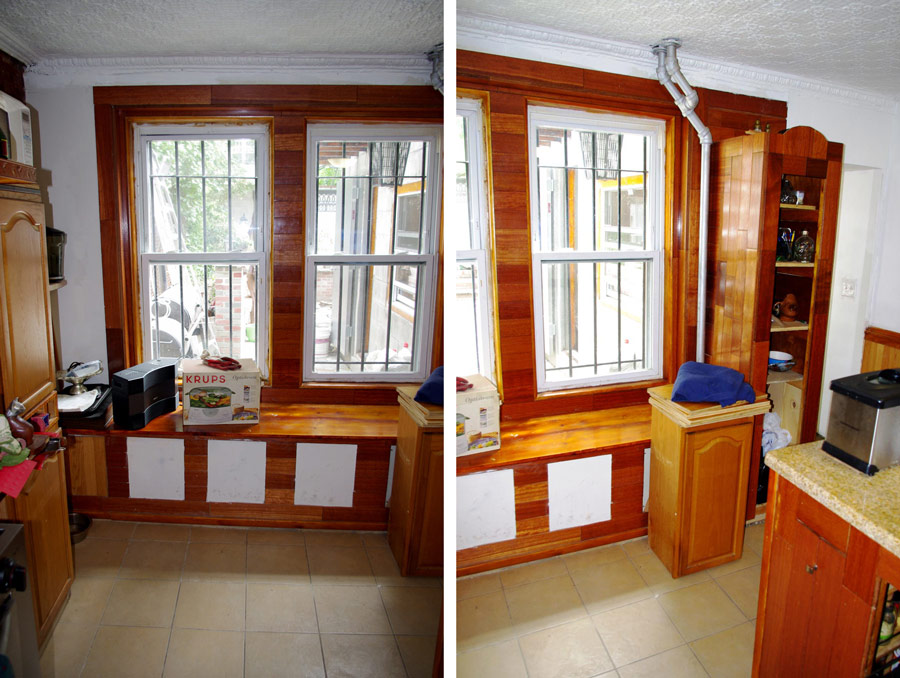
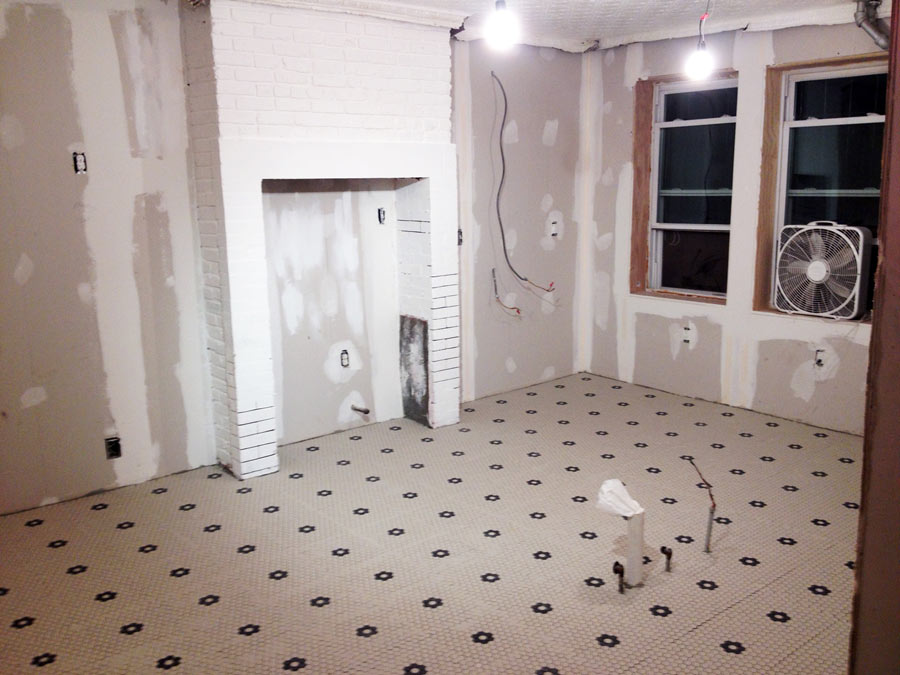
Here are some pictures of what the kitchen looked like when we started. At first glance, it may look semi-decent, but was mostly a DIY project gone wrong by the previous owner. The layout of the space was awkward, the cabinets were half-constructed (many without properly functioning doors and drawers) and the whole space was covered in multi-colored stained wood, which really darkened the overall space. The one thing we did keep was the refrigerator, as it was a pretty nice and fairly new Frigidaire Professional. The stove looked new at a glance, but was pretty dogged out, so we opted to replace it.

Planning
Before starting demo, we went to IKEA to look at kitchens, picked one out, then scheduled an on-site kitchen planning session to design the space. At $199 for the session, we felt it was a pretty good deal. The designer came to the house, took all the measurements, then laid out kitchen right there while we watched.
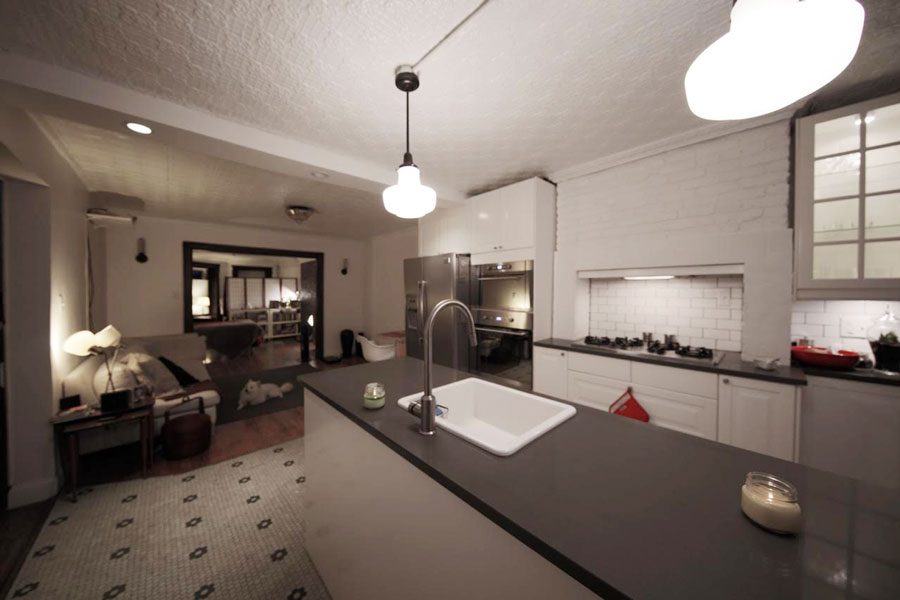
We really wanted the kitchen to be the showpiece of the apartment, so we included glass cabinet doors with lighting, a built in wall oven and microwave, apartment-sized dishwasher, dark gray quartz countertops and a classic white subway tile backsplash. The previous owner had his cooktop / oven sitting inside the space where the fireplace used to be. We thought this was a fun idea, plus it made the most sense for ventilation, so we kept our new cooktop in that same spot.
When the designer was finished, she was able to show us these plans and 3d rendering:


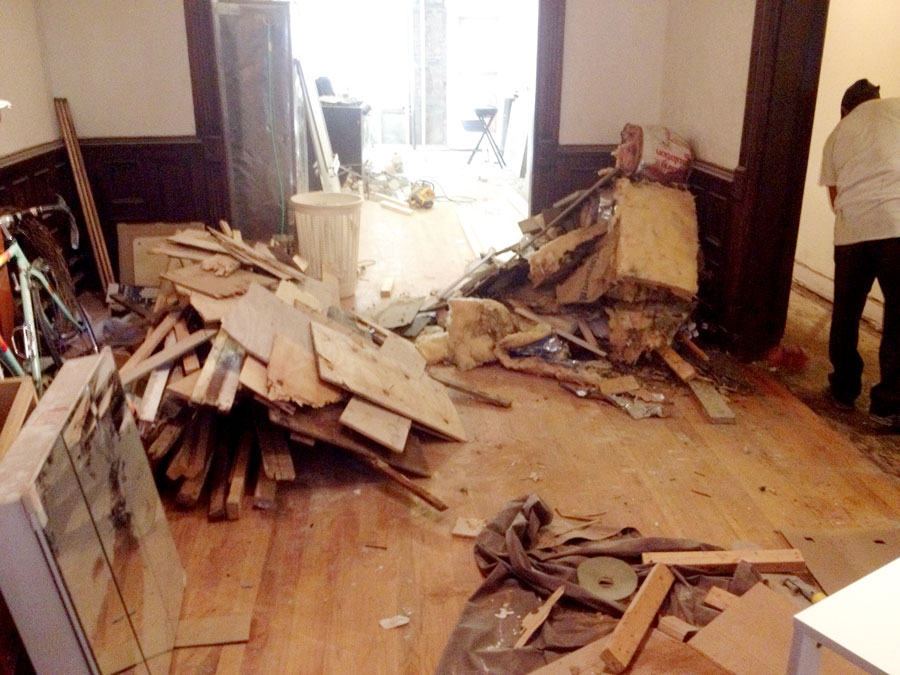
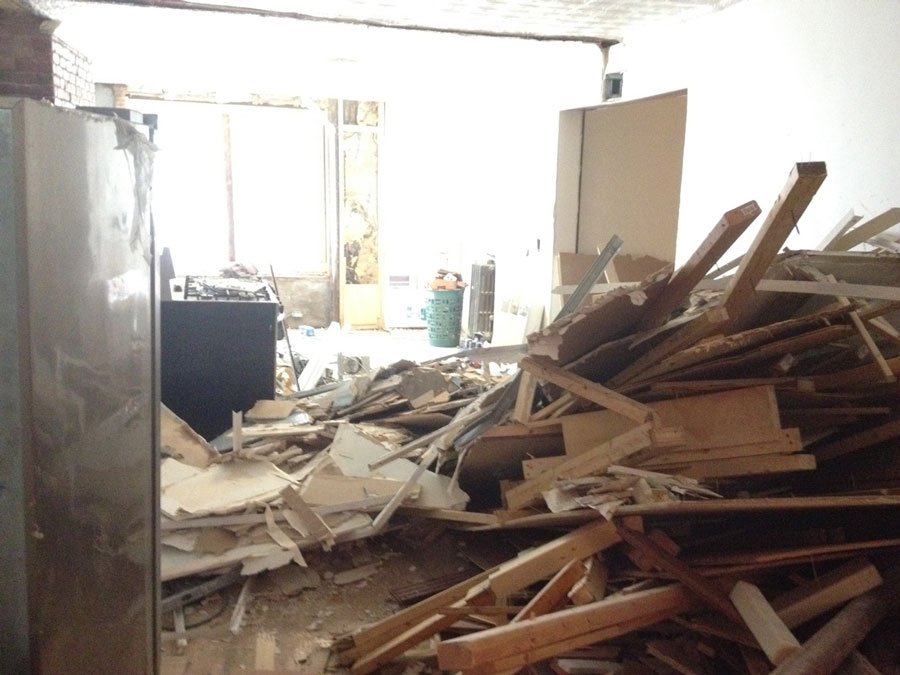
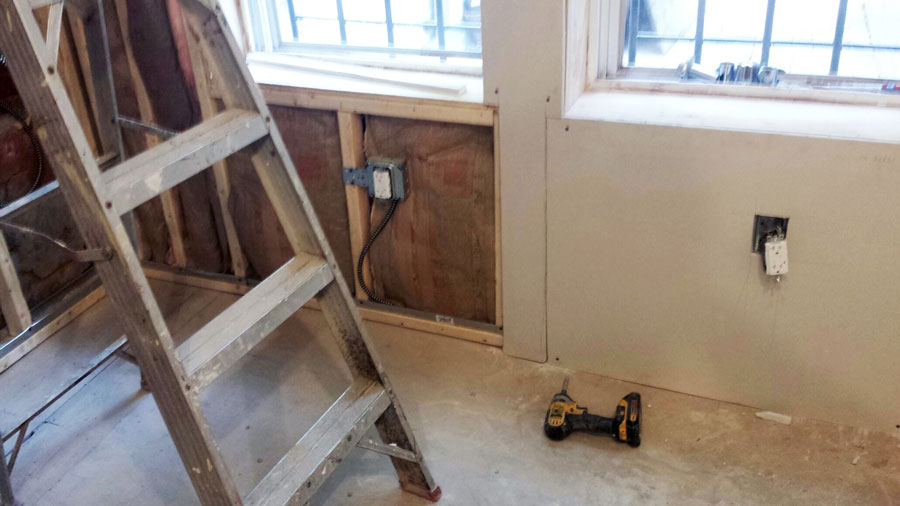
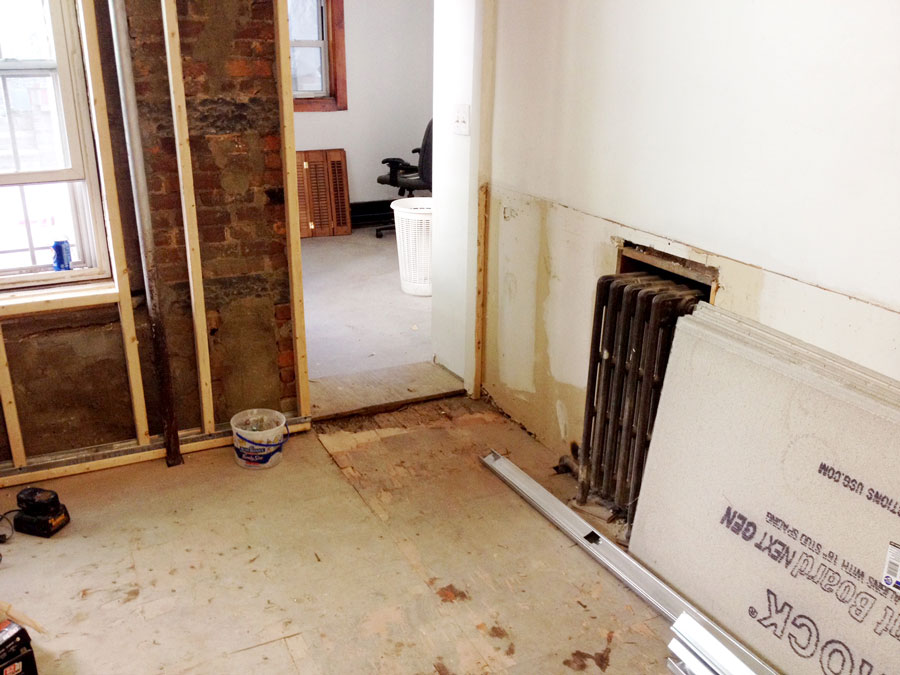
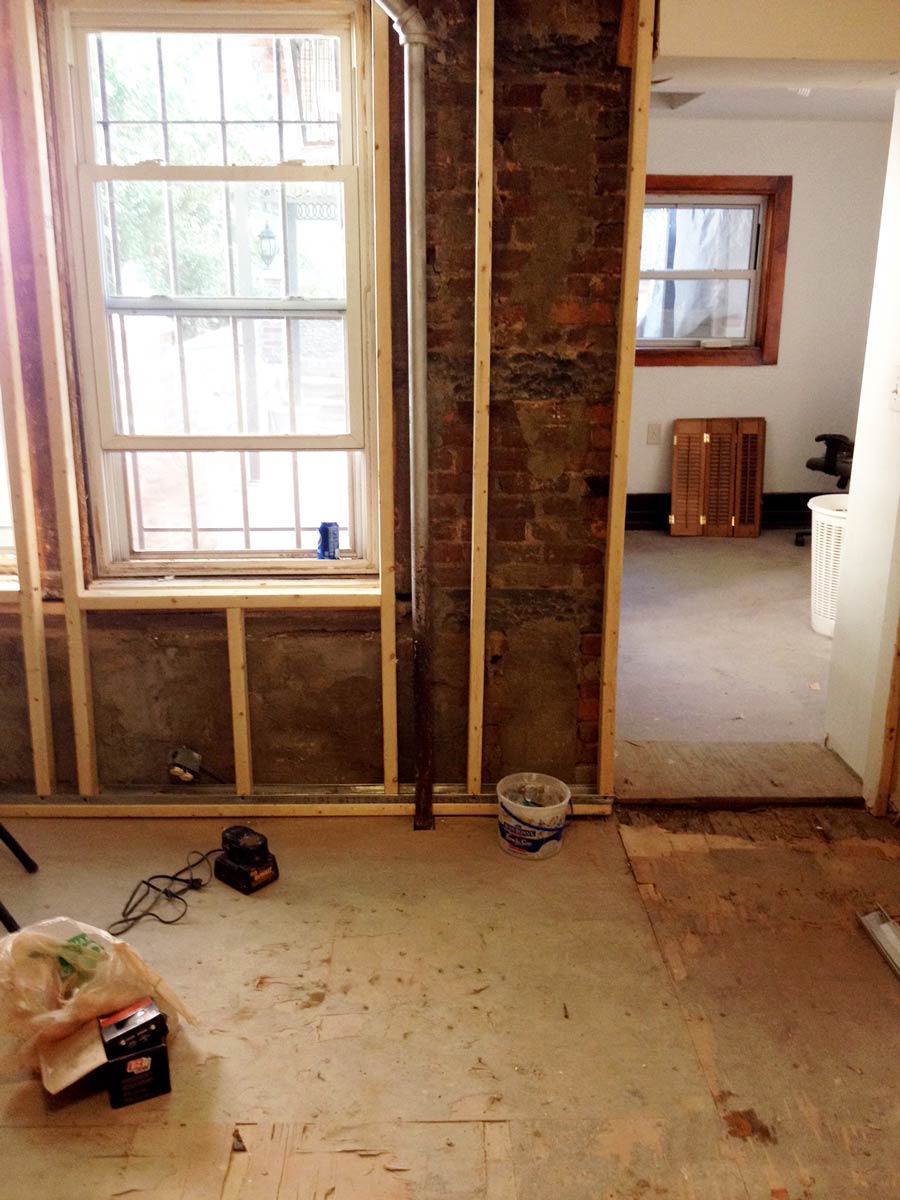
Demo
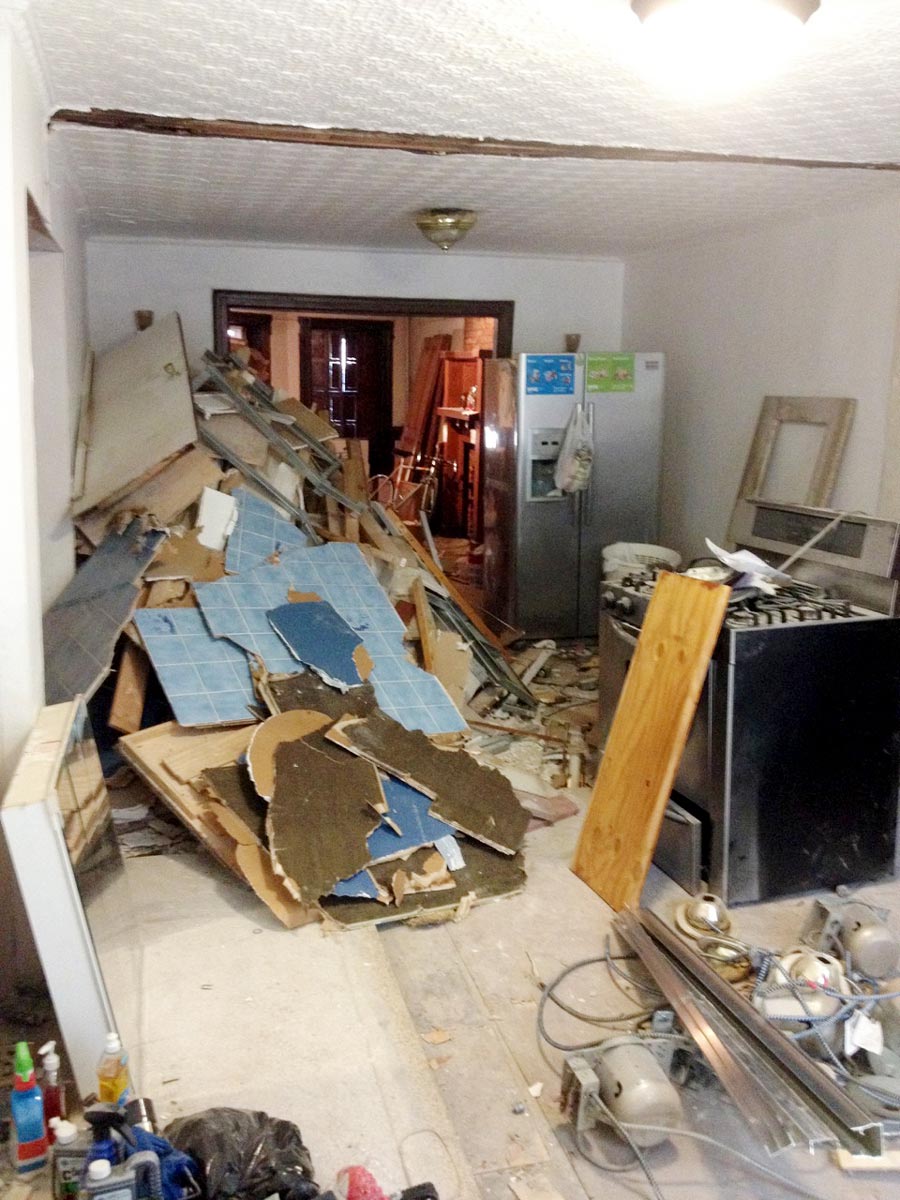
With the kitchen ordered, we were all set to begin work. Initially, James and I did a lot of the demo ourselves, but eventually handed it over to the contractors we hired. We also had a lot more shopping to do, as we needed to decide on new tile, paint, lighting, etc.
Here are a few shots of the demo. Most of the mess you see was from the kitchen, but some was from the bathroom which was undergoing renovation at the same time:
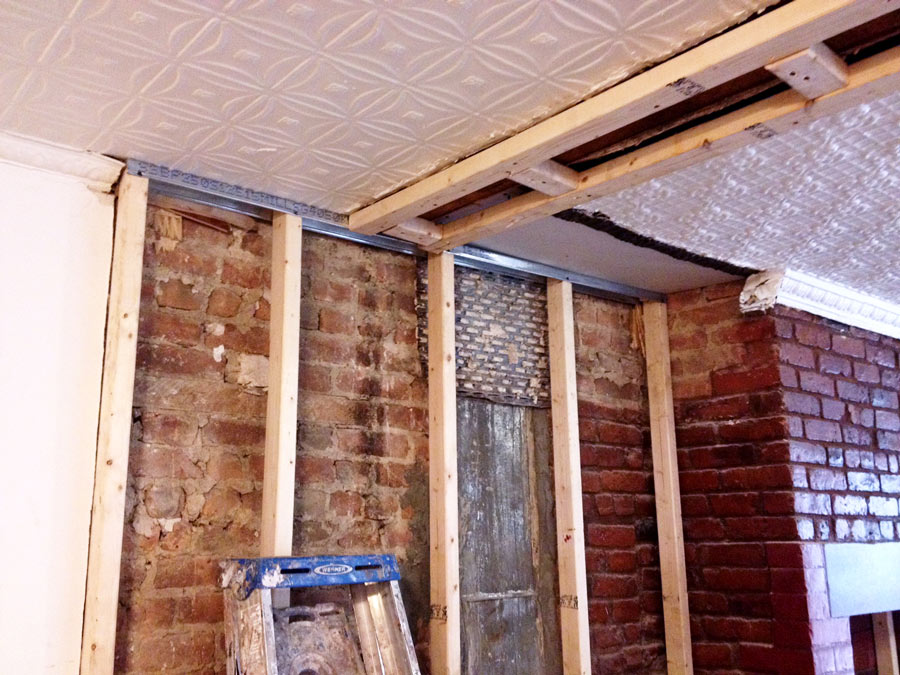
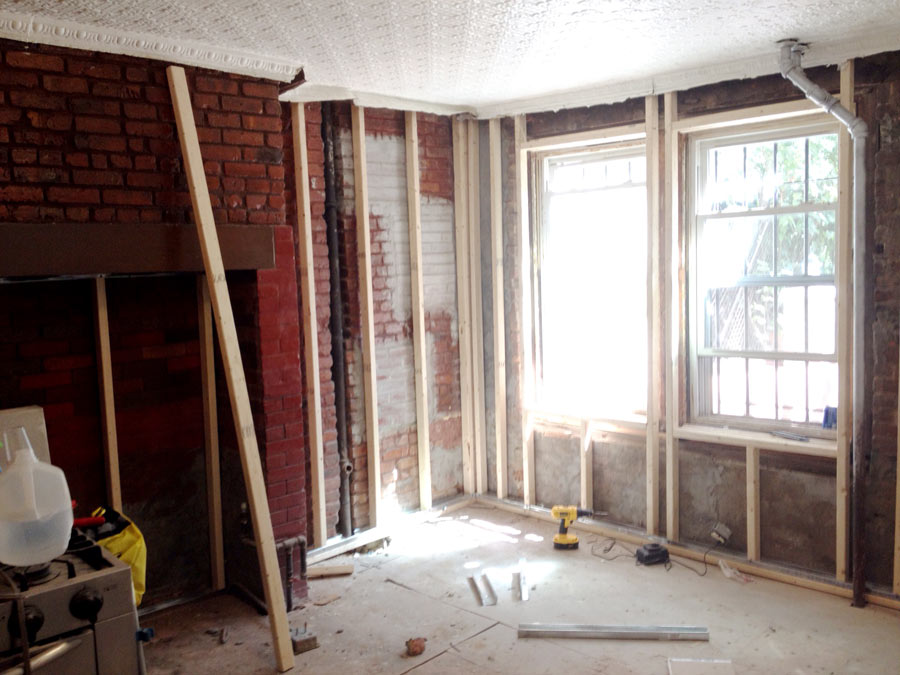
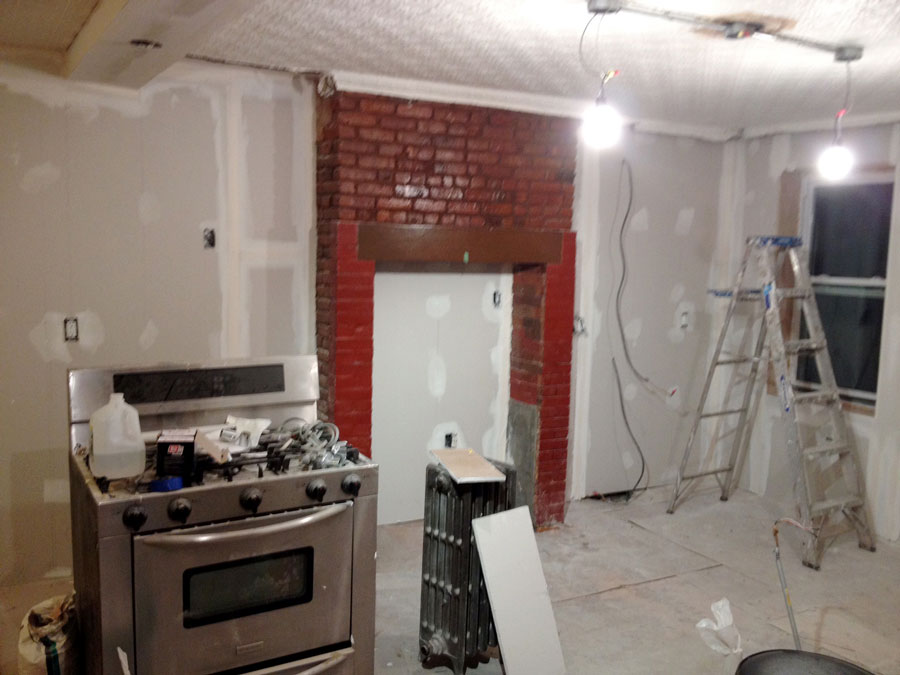
Construction
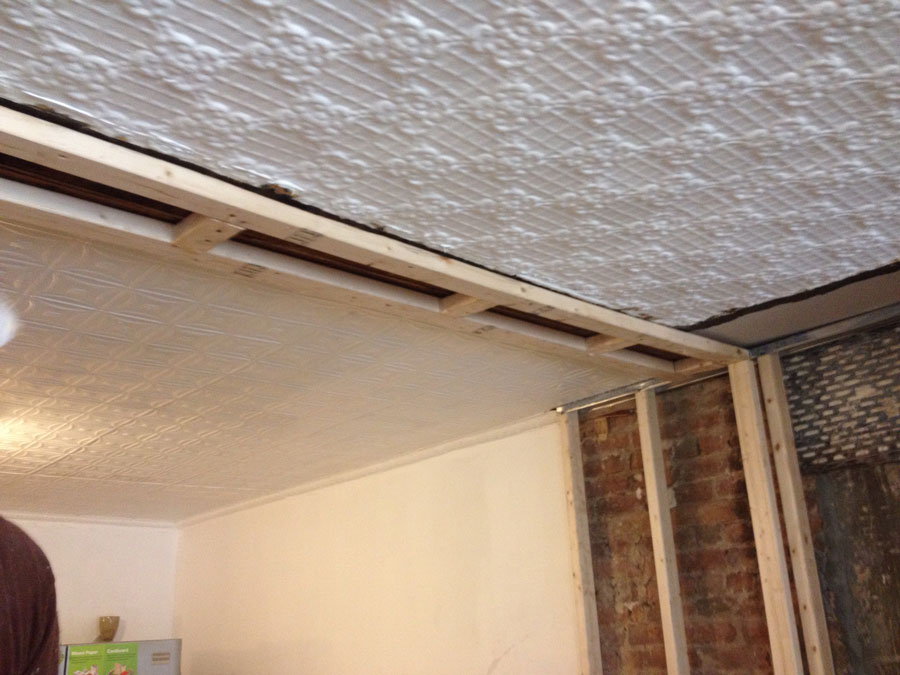
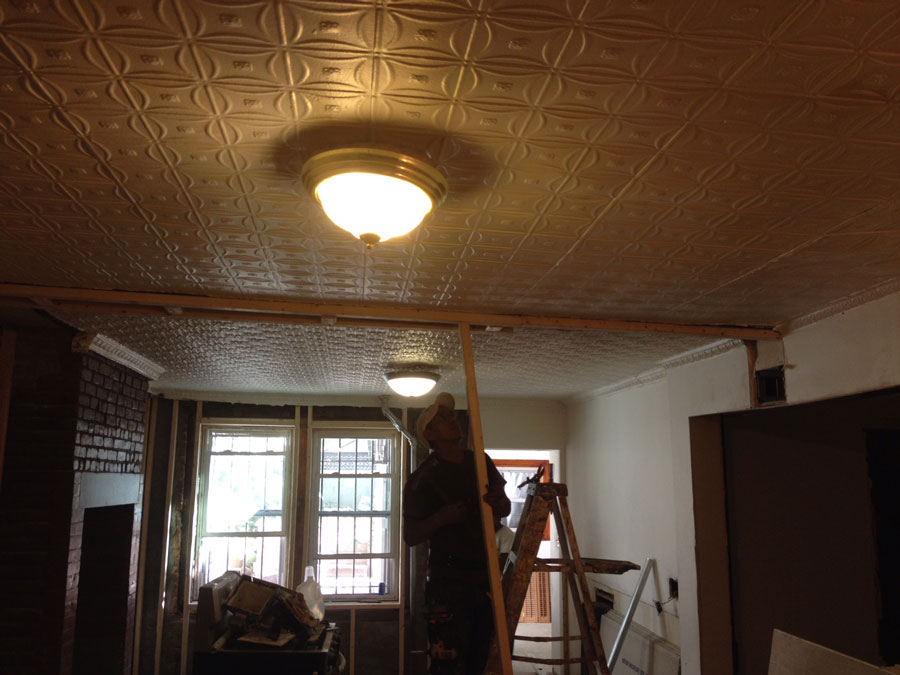
Once demo was complete, construction began. Ultimately, the kitchen would be installed by IKEA, but first we had to frame out the wall the cabinets would be hanging on, as well as frame out the back windows and door, and tile the floor. Here’s how it played out:
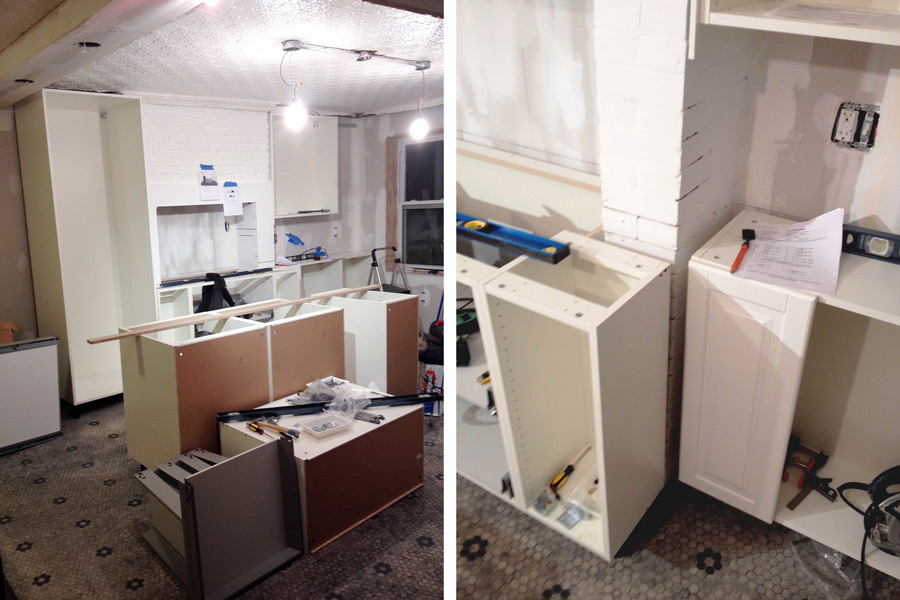
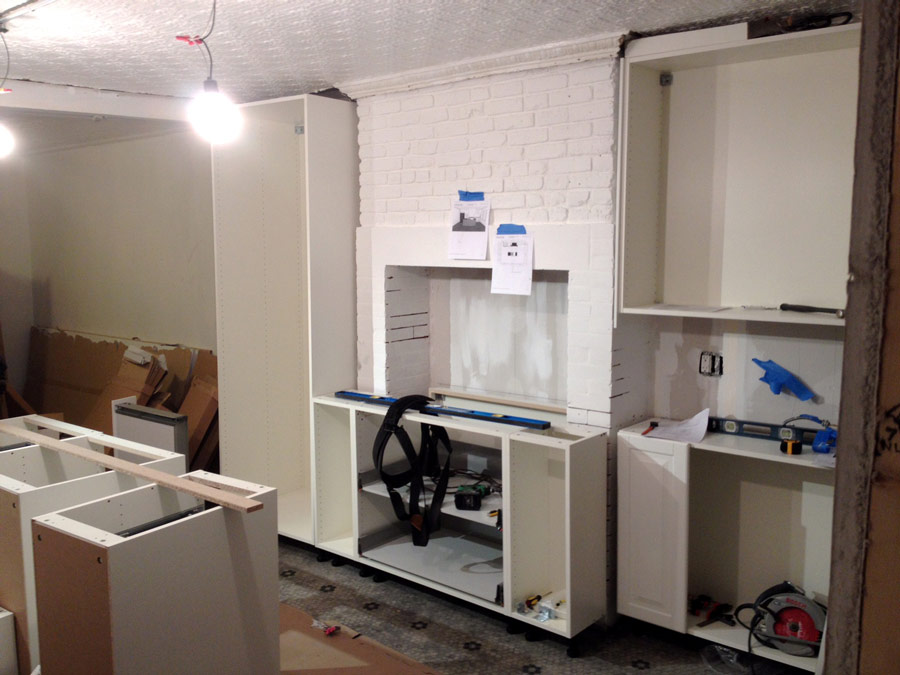
Cabinet Installation
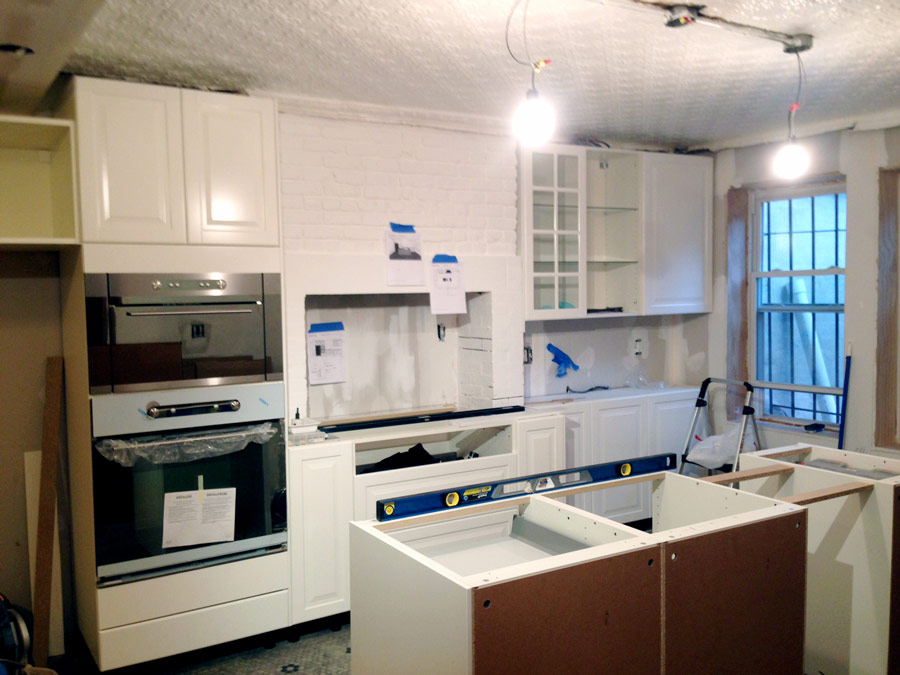
Once the tile was laid and the walls prepped, the cabinet installation began. This was when the kitchen really started coming together. The last step was the installation of the quartz countertops (also from IKEA):
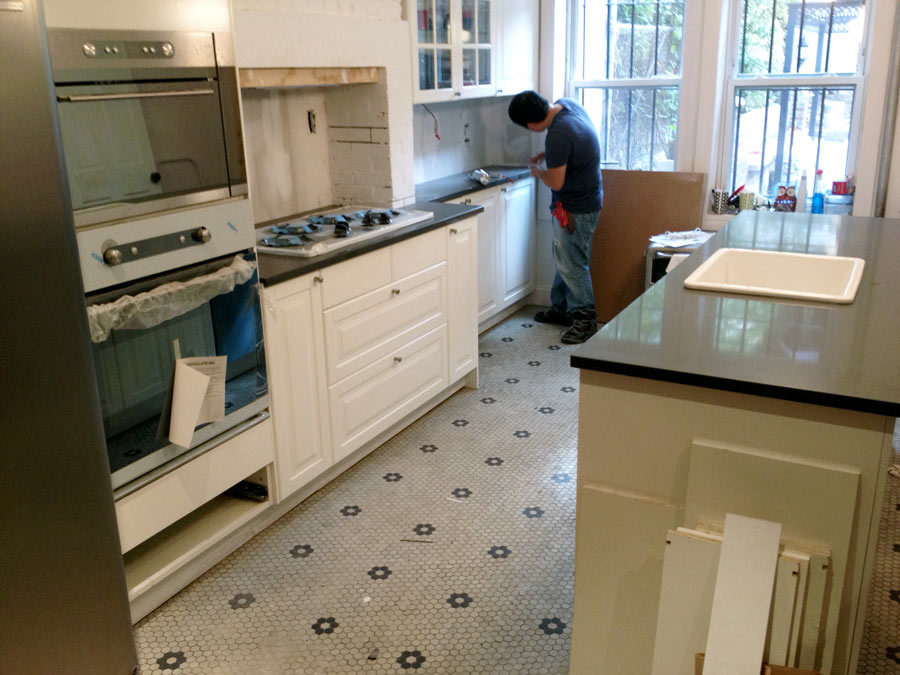
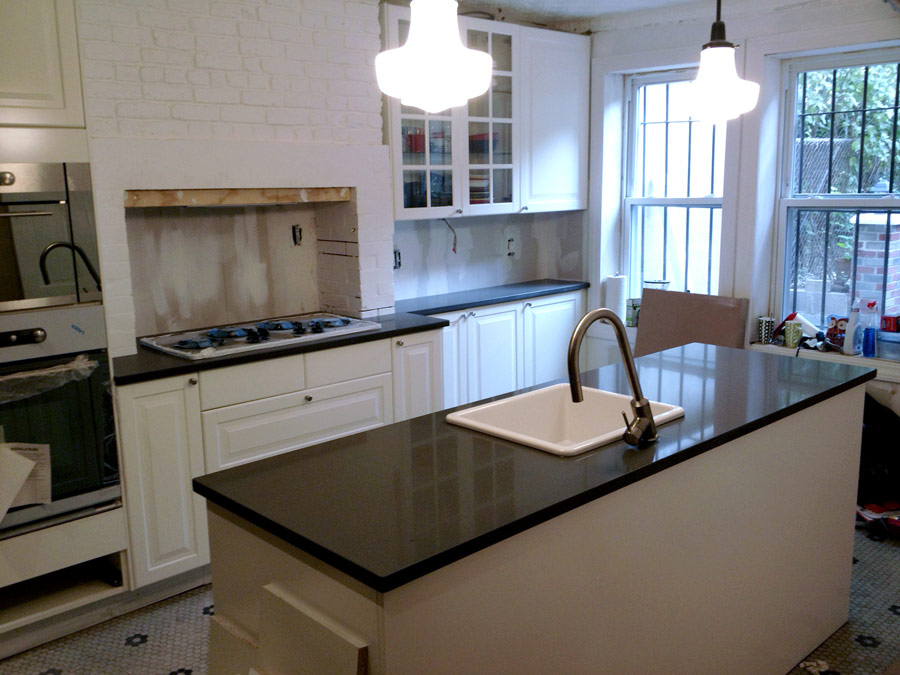
In the end, the kitchen came together beautifully. It’s modern, yet classic and blends well with the tin ceiling and original woodwork throughout the apartment. Here are a few pics of the completed space: